Showing posts with label RISCV. Show all posts

Saturday, April 11, 2020

Circuit Python on the FOMU in WSL (plus the pains of building your own RISC-V toolchain)


I started down the road of learning FPGA Circuit Python last month, with the (admittedly overly-ambitious) goal of getting Circuit Python working on the ULX3S. I was inspired to revisit this today when I saw Adafruit Blog - CircuitPython 5.2.0 Released - that specifically mentioned LiteX for Circuit Python!! In this case, for the FOMU.

TL;DR - WSL is by default NOT Case Sensitive. Use fsutil.exe in a DOS admin window to change this for each directory. To compile, riscv64-unknown-elf-gcc is needed, but the RISC-V GitHub GNU Repo does not work here to build Circuit Python. Use the FOMU toolchain. The make parameter should be lower case: make BOARD=fomu

If you are interested in Circuit Python, check out this CircuitBrains Deluxe on Crowd Supply.

See Adafruit instructions on building Circuit Python. All of the downloads for Circuit Python are available online. Well, all but of course the FOMU that I am most interested in. Hopefully it will be there soon, so for now we are doing this the hard way. (no fun if it is too easy, right?)

I could not find any documentation on the FOMU build, so I had to dig and search for keywords. The initial part of fetching from GitHub is pretty standard, so we'll start there:

git clone https://github.com/adafruit/circuitpython.git
cd circuitpython
git submodule sync
git submodule update --init
make -C mpy-cross
When doing the git submodule update --init in DOS (I sometimes do that, since my git clones are in C:\workspace - even though I compile in WSL from /mnt/c/workspace/)... I saw these errors:
git submodule update --init
Submodule 'extmod/ulab' (https://github.com/v923z/micropython-ulab/) registered for path 'extmod/ulab'
...etc
Submodule path 'lib/nrfutil': checked out '9e7dfb28a5c6f3d7a19340971b32e0c2b4128ecf'
Submodule path 'lib/tinyusb': checked out '1f95f439e11f519e69d75a4a8b7b9f28eaf5060e'
error: unable to create file tests/decomp-bad-inputs/00/id:000000,sig:11,src:000000,op:flip1,pos:10: Invalid argument
...etc
error: unable to create file tests/decomp-bad-inputs/00/id:000012,sig:11,src:000000,op:arith8,pos:11,val:+6: Invalid argument
error: unable to create file tests/decomp-bad-inputs/00/id:000013,sig:11,src:000000,op:arith8,pos:12,val:-9: Invalid argument
error: unable to create file tests/decomp-bad-inputs/00/id:000014,sig:11,src:000000,op:havoc,rep:16: Invalid argument
error: unable to create file tests/decomp-bad-inputs/00/id:000015,sig:11,src:000000,op:havoc,rep:2: Invalid argument
... many, many more similar errors
When doing the git submodule update --init from WSL just a few moments later, I did not see those errors. Perhaps there's some issue with Windows file names. (edit: I learned later this is likely a case sensitivity issue, see below).

For the FOMU, there's a Makefile in ./ports/litex
cd ./ports/litex
make BOARD=fomu
Edit: note that a case insensitive directory setting may allow BOARD=FOMU to work. ymmv. The safest one to use is a lower-case: BOARD=fomu.

If you see an error like this:
xargs: riscv64-unknown-elf-gcc: No such file or directory
../../py/mkrules.mk:81: recipe for target 'build-FOMU/genhdr/qstr.i.last' failed
make: *** [build-FOMU/genhdr/qstr.i.last] Error 127
make: *** Deleting file 'build-FOMU/genhdr/qstr.i.last'
Then try riscv64-unknown-elf-gcc --version to see if this RISC-V compiler is installed (perhaps you need to install the compiler). sadly, this is a different version of the compiler than is used in my ULX3S toolchain builder, that uses rv32i installed to /opt/riscv32i. Of course it does. Sometimes I wonder if this is all a hard drive manufacturer conspiracy to use as much disk space as possible. ;)

If like me you don't have the right compiler installed, make sure you have plenty of disk space:
This process will start by downloading about 200 MiB of upstream sources, then will patch, build, and install the toolchain. If a local cache of the upstream sources exists in $(DISTDIR), it will be used; the default location is /var/cache/distfiles. Your computer will need about 8 GiB of disk space to complete the process.

Here's what I did in WSL:
sudo apt-get install autoconf automake autotools-dev curl python3 libmpc-dev libmpfr-dev libgmp-dev gawk build-essential bison flex texinfo gperf libtool patchutils bc zlib1g-dev libexpat-dev
git clone --recursive https://github.com/riscv/riscv-gnu-toolchain  
cd riscv-gnu-toolchain  
./configure --prefix=/opt/riscv
sudo mkdir /opt/riscv
sudo chown $USER /opt/riscv
if [ "$(echo $PATH | grep  /opt/riscv/bin)" == "" ]; then export PATH=$PATH:/opt/riscv/bin; fi
make
You may wish to put the export PATH=$PATH:/opt/riscv/bin in your ./bash.rc file.

Do NOT run make linux if you want riscv64-unknown-elf-gcc files! The linux option creates riscv64-unknown-linux-gnu files, not elf!.

My first attempt at install failed. After hours of downloading and building, the errors started here (and yes, I also incorrectly specified linux):

mv -f /mnt/c/workspace/riscv-gnu-toolchain/build-glibc-linux-rv64imafdc-lp64d/elf/rtld-libc.aT /mnt/c/workspace/riscv-gnu-toolchain/build-glibc-linux-rv64imafdc-lp64d/elf/rtld-libc.a
make[4]: Leaving directory '/mnt/c/workspace/riscv-gnu-toolchain/riscv-glibc/elf'
riscv64-unknown-linux-gnu-gcc    -nostdlib -nostartfiles -r -o /mnt/c/workspace/riscv-gnu-toolchain/build-glibc-linux-rv64imafdc-lp64d/elf/librtld.os '-Wl,-(' /mnt/c/workspace/riscv-gnu-toolchain/build-glibc-linux-rv64imafdc-lp64d/elf/dl-allobjs.os /mnt/c/workspace/riscv-gnu-toolchain/build-glibc-linux-rv64imafdc-lp64d/elf/rtld-libc.a -lgcc '-Wl,-)' \
          -Wl,-Map,/mnt/c/workspace/riscv-gnu-toolchain/build-glibc-linux-rv64imafdc-lp64d/elf/librtld.os.map
riscv64-unknown-linux-gnu-gcc    -nostdlib -nostartfiles -shared -o /mnt/c/workspace/riscv-gnu-toolchain/build-glibc-linux-rv64imafdc-lp64d/elf/ld.so.new               \
          -Wl,-z,combreloc -Wl,-z,relro -Wl,--hash-style=both -Wl,-z,defs       \
          /mnt/c/workspace/riscv-gnu-toolchain/build-glibc-linux-rv64imafdc-lp64d/elf/librtld.os -Wl,--version-script=/mnt/c/workspace/riscv-gnu-toolchain/build-glibc-linux-rv64imafdc-lp64d/ld.map            \
          -Wl,-soname=ld-linux-riscv64-lp64d.so.1                       \
          -Wl,-defsym=_begin=0
/opt/riscv/lib/gcc/riscv64-unknown-linux-gnu/9.2.0/../../../../riscv64-unknown-linux-gnu/bin/ld: /mnt/c/workspace/riscv-gnu-toolchain/build-glibc-linux-rv64imafdc-lp64d/elf/librtld.os: in function `process_envvars':
/mnt/c/workspace/riscv-gnu-toolchain/riscv-glibc/elf/rtld.c:2484: undefined reference to `__GI___open64_nocancel'
/opt/riscv/lib/gcc/riscv64-unknown-linux-gnu/9.2.0/../../../../riscv64-unknown-linux-gnu/bin/ld: /mnt/c/workspace/riscv-gnu-toolchain/build-glibc-linux-rv64imafdc-lp64d/elf/librtld.os: in function `dl_main':
/mnt/c/workspace/riscv-gnu-toolchain/riscv-glibc/elf/rtld.c:1317: undefined reference to `__access'
/opt/riscv/lib/gcc/riscv64-unknown-linux-gnu/9.2.0/../../../../riscv64-unknown-linux-gnu/bin/ld: /mnt/c/workspace/riscv-gnu-toolchain/riscv-glibc/elf/rtld.c:2103: undefined reference to `__access'
/opt/riscv/lib/gcc/riscv64-unknown-linux-gnu/9.2.0/../../../../riscv64-unknown-linux-gnu/bin/ld: /mnt/c/workspace/riscv-gnu-toolchain/riscv-glibc/elf/rtld.c:1564: undefined reference to `__GI___close_nocancel'
and eventually culminated here:

/opt/riscv/lib/gcc/riscv64-unknown-linux-gnu/9.2.0/../../../../riscv64-unknown-linux-gnu/bin/ld: final link failed: bad value
collect2: error: ld returned 1 exit status
Makefile:496: recipe for target '/mnt/c/workspace/riscv-gnu-toolchain/build-glibc-linux-rv64imafdc-lp64d/elf/ld.so' failed
make[3]: *** [/mnt/c/workspace/riscv-gnu-toolchain/build-glibc-linux-rv64imafdc-lp64d/elf/ld.so] Error 1
make[3]: Leaving directory '/mnt/c/workspace/riscv-gnu-toolchain/riscv-glibc/elf'
Makefile:258: recipe for target 'elf/subdir_lib' failed
make[2]: *** [elf/subdir_lib] Error 2
make[2]: Leaving directory '/mnt/c/workspace/riscv-gnu-toolchain/riscv-glibc'
Makefile:9: recipe for target 'all' failed
make[1]: *** [all] Error 2
make[1]: Leaving directory '/mnt/c/workspace/riscv-gnu-toolchain/build-glibc-linux-rv64imafdc-lp64d'
Makefile:234: recipe for target 'stamps/build-glibc-linux-rv64imafdc-lp64d' failed
make: *** [stamps/build-glibc-linux-rv64imafdc-lp64d] Error 2
I was about to open a GitHub issue, and then thought - hm... perhaps I just read the rest of the README, eh? I know, I know, actually RTFM'ing takes away all the fun, but it is rather embarrassing when someone tells you to read the fine manual in response to asking for help. Sure enough, I found this:
If building a linux toolchain on a MacOS system, or on a Windows system using the Linux subsystem or cygwin, you must ensure that the filesystem is case-sensitive. A build on a case-insensitive filesystem will fail when building glibc because *.os and *.oS files will clobber each other during the build eventually resulting in confusing link errors. @tnt aka smunaut has a RISC-V USB project in the works.
In order to install RISC-V for WSL I found this article that noted after Windows 10 version 17093 there's a command fsutil.exe for setting case sensitivity:

fsutil.exe file setCaseSensitiveInfo riscv-gnu-toolchain enable

Note this needs to be run in a DOS Window, not WSL, and with Administrative permissions:


BUT! Note the command is only for the specified directory, and the attribute is NOT inherited  (and certainly does not get applied to each existing sub-directory). So we need to iterate through all sub-directories individually. Yes, I'm sure many readers are rolling their eyes at this point, asking why I am doing this in WSL and not a "real" Linux machine or even a VM; what am I doing in Windows? I ask myself that sometimes, too. Well, I just think WSL is just too cool! Plus, I suppose that I like the challenge. So anyway, here's what I did to set case sensitivity:

cd \workspace\riscv-gnu-toolchain\
for /f %f in ('dir /ad /s /b') do fsutil.exe file setCaseSensitiveInfo %f enable
There are many directories. Be patient...

As a reminder, that command is meant to be executed interactively. If placed into a batch file, the percent symbols need to be doubled up.

Now that everything in the riscv-gnu-toolchain directory is case sensitive, I ran make again:

cd /mnt/c/workspace/riscv-gnu-toolchain
make
This does a full rebuild, taking again a very long time. Did I mention being patient?

If you can run /opt/riscv/bin/riscv64-unknown-elf-gcc --version but see a lot of errors when doing a make BOARD=fomu like:
/opt/riscv/lib/gcc/riscv64-unknown-elf/9.2.0/include/stdint.h:9:16: fatal error: stdint.h: No such file or directory
That means the RISC-V make either failed... or you didn't wait until it finished. (for me, it was the latter; did I mention being patient?) Once the RISC-V make is complete, the FOMU code can be built:
cd /mnt/c/workspace/circuitpython/ports/litex
make BOARD=FOMU

Which resulted in this output:

$ make BOARD=FOMU
Use make V=1, make V=2 or set BUILD_VERBOSE similarly in your environment to increase build verbosity.
QSTR updated
make: msgfmt: Command not found
../../py/py.mk:338: recipe for target 'build-FOMU/genhdr/en_US.mo' failed
make: *** [build-FOMU/genhdr/en_US.mo] Error 127

so ok, a quick google yields something useful on stackoverflow

apt-get install gettext

and so even after than, I saw even more errors like this:
/opt/riscv/lib/gcc/riscv64-unknown-elf/9.2.0/../../../../riscv64-unknown-elf/bin/ld: build-FOMU/lib/libm/math.o: in function `floorf':
/mnt/c/workspace/circuitpython/ports/litex/../../lib/libm/math.c:790: undefined reference to `__addsf3'
/opt/riscv/lib/gcc/riscv64-unknown-elf/9.2.0/../../../../riscv64-unknown-elf/bin/ld: /mnt/c/workspace/circuitpython/ports/litex/../../lib/libm/math.c:795: undefined reference to `__addsf3'
/opt/riscv/lib/gcc/riscv64-unknown-elf/9.2.0/../../../../riscv64-unknown-elf/bin/ld: build-FOMU/lib/libm/math.o:/mnt/c/workspace/circuitpython/ports/litex/../../lib/libm/math.c:817: more undefined references to `__addsf3' follow
/opt/riscv/lib/gcc/riscv64-unknown-elf/9.2.0/../../../../riscv64-unknown-elf/bin/ld: build-FOMU/firmware.elf(.text): relocation ".L15+0x0 (type R_RISCV_RVC_JUMP)" goes out of range
/opt/riscv/lib/gcc/riscv64-unknown-elf/9.2.0/../../../../riscv64-unknown-elf/bin/ld: /opt/riscv/lib/gcc/riscv64-unknown-elf/9.2.0/libgcc.a(divsf3.o): file class ELFCLASS64 incompatible with ELFCLASS32
/opt/riscv/lib/gcc/riscv64-unknown-elf/9.2.0/../../../../riscv64-unknown-elf/bin/ld: final link failed: file in wrong format
collect2: error: ld returned 1 exit status
Makefile:177: recipe for target 'build-FOMU/firmware.elf' failed
make: *** [build-FOMU/firmware.elf] Error 1
So I did another one of these, this time for the circuitpython directory:

for /f %f in ('dir /ad /s /b') do fsutil.exe file setCaseSensitiveInfo %f enable

and things got even worse:
$ make BOARD=FOMU
Makefile:30: *** Invalid BOARD specified.  Stop.
So I tried to clean it, same error:
$ make BOARD=FOMU clean
Makefile:30: *** Invalid BOARD specified.  Stop.
Turns out that was case sensitive, so then it is:
make BOARD=fomu clean
make BOARD=fomu
Ok, at the point, readers must really, really wonder why I use Windows. I know, I know. But I'm persistent.

It still failed. I gave up and asked for help.
I didn't get an answer to "should I use the FOMU toolchain instead of the RISC-V, so I thought I'd try it:

# fetch and extract
wget https://github.com/im-tomu/fomu-toolchain/releases/download/v1.5.6/fomu-toolchain-linux_x86_64-v1.5.6.tar.gz 
tar -xzf fomu-toolchain-linux_x86_64-v1.5.6.tar.gz
sudo mv fomu-toolchain-linux_x86_64-v1.5.6 /opt/fomu-toolchain-linux_x86_64-v1.5.6

# set the path
if [ "$(echo $PATH | grep fomu-toolchain-linux_x86_64-v1.5.6)" == "" ]; then export PATH=$PATH:/opt/fomu-toolchain-linux_x86_64-v1.5.6/bin; fi

# verify it is in the path:
which riscv64-unknown-elf-gcc
riscv64-unknown-elf-gcc --version

cd /mnt/c/workspace/circuitpython/ports/litex
make BOARD=fomu  clean

And... TADA! A successful Circuit Python build for the FPGA FOMU!! Whew.

gojimmypi:/mnt/c/workspace/circuitpython/ports/litex
$ make BOARD=fomu
Use make V=1, make V=2 or set BUILD_VERBOSE similarly in your environment to increase build verbosity.
/opt/fomu-toolchain-linux_x86_64-v1.5.6/bin/../lib/gcc/riscv64-unknown-elf/8.3.0/../../../../riscv64-unknown-elf/bin/ld: warning: section `.bss' type changed to PROGBITS

739752 bytes free in flash firmware space out of 1048576 bytes (1024.0kB).
116920 bytes free in ram for stack and heap out of 131072 bytes (128.0kB).

Create build-fomu/firmware.dfu
python3 ../../tools/dfu.py -b build-fomu/firmware.bin -D 0x1209:0x5bf0 "build-fomu/firmware.dfu"

Other notes (thanks @pdp7): Using Python for creating hardware

Migen Step by Step Tutorial

LiteX is a fork of MiSoC

MiSoc and LiteX are both based on Migen


Sunday, March 29, 2020

LiteX Soft CPU on the ULX3S - reloading firmware without reflashing the soft CPU

My next post (aka notes to self) on getting a RISC-V compiled app onto the ULX3S using LiteX.

TL;DR; press the reset button!

Quite a diversion from my day job with SQL and C# and web apps is this fascinating world of soft CPU's and embedded devices. Here's what I learned this weekend:

In my prior blogs, I considered getting Circuit Python running on the ULX3S. There are a lot of moving parts, so I got started with implementing the RISC-V soft CPU on the FPGA. Recall we cannot run Circuit Python on the ESP32 because of hardware limitations (missing USB OTG), however the ESP32-S2 will (in theory) work with Circuit Python. Next, I rambled on a bit regarding various features of LiteX that I was exploring in my prior blog, in the end creating a soft_cpu.sh script with everything I learned.

Refresher:  Onboard the ULX3S is an ECP5 FPGA. We first need to create a soft CPU bitstream that is loaded onto the ECP5LiteX also creates a BIOS that gets loaded over the serial port. Ok, all fine and dandy, but I seem to only be able to load that BIOS once and then the terminal becomes unresponsive. This makes sense, as the processor stays in the while loop after liftoff. The bios does not appears to be an RTOS.

ULX3S shown with FPGA/BIOS/firmware programming USB cable

Supposedly that BIOS should be able to reload firmware apps. Well, there's this mystery boot_helper. What does this extern do? I suspect that's what loads the BIOS. Then what? There's this 4 line boot-helper-picorv32.S file. Not much help there. The "What is LiteX" introduction does seem to indicate that the development cycle includes reloading the soft CPU, as the "design flow in a nutshell" indicates going back to step 1. I'd like to go back to step 6, skipping the re-synthesis of the soft CPU every time I change the firmware.

The LiteX for the ULX3S has a serial port configured as Tx on Pin L4 (FTDI RxD) and Rx on Pin M1 (FTDI TxD). See the schematic. These pins are not available on either of the external ULX3S headers.

FTDI RxD/TxD USB Serial on ULX3S FPGA pins L4 and M1
I had thought perhaps the BIOS would be looking on a pair of pins implemented in the FPGA as a serial port. Nope. Those pins are definitely hard wired the the FTDI USB serial port.

So what else is there? Well, the BIOS is clearly not an RTOS. So we're definitely waiting forever and doing nothing in that while (1) statement. How else does a CPU begin again? Reset of course! Check out the rst implementation in LiteX. It is hooked to R1 of the FPGA. What's that?

R1 (aka BTN_F1) on the ULX3S
That's the F1 button!! (The "Fire 1" position when the ULX3S is in gamer mode! lol). This is also labeled as "B1" on the PCB, located near the SD card, right under the text "2.5V/3.3V"

It turns out the architecture is not [CPU] - [BIOS] - [firmware]. Instead, the simpler: [CPU (with tiny, baked in BIOS] - [BIOS (with external firmware)].  Now, one could certainly write something in the BIOS to, say load an OS. But that's not what LiteX is doing out of the box in this example.

The architecture naming is a bit misleading, as there is part of the CPU implemented as a BIOS as seen at processor boot time on the LiteX. Unfortunately the external "C" program is also called BIOS (firmware).


So just leave litex_term running and press the F1 (CPU reset) button to reload the BIOS firmware. See my soft_cpu.sh bash script. Each time you update and compile the BIOS code, press the F1 button to reload it onto the soft CPU.

I've created LiteX Pull Request #445 that adds some comments to hopefully help others that may encounter these issues.

How many times can an FPGA be reprogrammed? Well, the folks at Numato claim "SRAM based FPGAs can be programmed as many times as necessary. There is no limit..."

There's also the possibility of using a logic analyzer internally to the FPGA. Also mentioned in the What is LiteX is something called litescope. See the Debugging with ChipScope for more information, as there's not much in the Wiki as of the data of this blog. The architecture image provides some insight. See also the test_analyzer.py.

So now.. I wonder if I can single-step code soft CPU code with OpenOCD. And that litescope! That sounds super interesting...

Saturday, March 28, 2020

RISC-V on the ULX3S with LiteX - Part 2

First .. the exciting news: With 24 days still left in the Crowd Funding Campaign, the ULX3S is within a few dollars of reaching their $40K stretch goal!! I'm so happy to see their success. I've been super happy with mine. (Edit: now nearly 300% funded by the time I publish this!)

TL;DR: Check out this soft_cpu.sh script used to create a soft RISC-V CPU on the ULX3S.

Back to my fomu! I revisited the Adafruit Feather M0 Express - A request for the USB device descriptor failed: Issue #293 on GitHub in the hathach/tinyusb repo. The suggestion was to simply update my fomu to see if the Feather M0 problems would go away:

The last few lines of the release.sh
dfu-suffix -v 1209 -p 70b1 -a $output/${platform}-updater-${release}.dfu
dfu-suffix -v 1209 -p 70b1 -a $output/${platform}-foboot-${release}.dfu
but I saw an error when trying to do that:
C:\Download\dfu-util>dfu-suffix -v 1209 -p 70b1 -a fomu\hacker-updater-v2.0.3.dfu
dfu-suffix (dfu-util) 0.9

Copyright 2011-2012 Stefan Schmidt, 2013-2014 Tormod Volden
This program is Free Software and has ABSOLUTELY NO WARRANTY
Please report bugs to http://sourceforge.net/p/dfu-util/tickets/

Please remove existing DFU suffix before adding a new one.
so I next tried using dfu-util, as noted here:
C:\Download\dfu-util>dfu-util -D fomu\hacker-updater-v2.0.3.dfu
dfu-util 0.9

Copyright 2005-2009 Weston Schmidt, Harald Welte and OpenMoko Inc.
Copyright 2010-2016 Tormod Volden and Stefan Schmidt
This program is Free Software and has ABSOLUTELY NO WARRANTY
Please report bugs to http://sourceforge.net/p/dfu-util/tickets/

Match vendor ID from file: 1209
Match product ID from file: 70b1
Opening DFU capable USB device...
ID 1209:5bf0
Run-time device DFU version 0101
Claiming USB DFU Interface...
Setting Alternate Setting #0 ...
Determining device status: state = dfuIDLE, status = 0
dfuIDLE, continuing
DFU mode device DFU version 0101
Device returned transfer size 1024
Copying data from PC to DFU device
Download        [=========================] 100%       112828 bytes
Download done.
state(7) = dfuMANIFEST, status(0) = No error condition is present
state(8) = dfuMANIFEST-WAIT-RESET, status(0) = No error condition is present
Done!

Since that seems to have been successful, I will return to the ULX3S for now.

A quick check of the rxrbln/picorv32 ULX3S fork that is is included in my full toolchain install and I'm still not yet able to build:

gojimmypi@ubuntu:~/workspace/rxrbln-picorv32/picosoc$ git fetch
gojimmypi@ubuntu:~/workspace/rxrbln-picorv32/picosoc$ git pull
Already up to date.
gojimmypi@ubuntu:~/workspace/rxrbln-picorv32/picosoc$ make
iverilog -s testbench -o hx8kdemo_tb.vvp hx8kdemo_tb.v hx8kdemo.v spimemio.v simpleuart.v picosoc.v ../picorv32.v spiflash.v `yosys-config --datdir/ice40/cells_sim.v`
picosoc.v:70: error: NULL port declarations are not allowed.
Makefile:20: recipe for target 'hx8kdemo_tb.vvp' failed
make: *** [hx8kdemo_tb.vvp] Error 1
gojimmypi@ubuntu:~/workspace/rxrbln-picorv32/picosoc$ 

So ok, I'll give that one some more time.

Refresher on getting Micropython onto the fomu:
cd /mnt/c/workspace
mkdir -p fomu
cd fomu
wget https://github.com/im-tomu/fomu-workshop/raw/master/micropython-fomu.dfu
dfu-util -D micropython-fomu.dfu
Should give an output like this:
dfu-util 0.9

Copyright 2005-2009 Weston Schmidt, Harald Welte and OpenMoko Inc.
Copyright 2010-2016 Tormod Volden and Stefan Schmidt
This program is Free Software and has ABSOLUTELY NO WARRANTY
Please report bugs to http://sourceforge.net/p/dfu-util/tickets/

Match vendor ID from file: 1209
Match product ID from file: 5bf0
Opening DFU capable USB device...
ID 1209:5bf0
Run-time device DFU version 0101
Claiming USB DFU Interface...
Setting Alternate Setting #0 ...
Determining device status: state = dfuIDLE, status = 0
dfuIDLE, continuing
DFU mode device DFU version 0101
Device returned transfer size 4096
Copying data from PC to DFU device
Download        [=========================] 100%       136164 bytes
Download done.
state(7) = dfuMANIFEST, status(0) = No error condition is present
state(8) = dfuMANIFEST-WAIT-RESET, status(0) = No error condition is present
Done!
Mine showed up as COM8 and For more details on how a RISC-V soft CPU runs MicroPython, see the Fomu as a CPU section of the fomu workshop.

I've been following along with the development of picosoc for the ULX3S. This is included in the full toolchain build, or can be fetched from here:

cd $WORKSPACE
git clone https://github.com/rxrbln/picorv32.git
To build:

# use the rxrbln firmwware
cd $WORKSPACE/rxrbln-picorv32/picosoc

# there have been some recent additions to the source code; some files not included in the repo
# so get an older, know-to-compile version:
git checkout b1cd395b

make ulx3s_fw.img
$WORKSPACE/ulx3s-examples/bin/ujprog.exe -j FLASH -f 0x200000 ulx3s_fw.img

Use the LiteX CPU
# make the soft CPU
cd $WORKSPACE/litex-boards/litex_boards/targets
./ulx3s.py --device LFE5U-85F --cpu-type picorv32

# show the files built
echo "ULX3S Gateware:"
ls $WORKSPACE/litex-boards/litex_boards/targets/soc_basesoc_ulx3s/gateware -al

echo "ULX3S BIOSL"
ls $WORKSPACE/litex-boards/litex_boards/targets/soc_basesoc_ulx3s/software/bios -al

# put the soft CPU on the ULX3S
cd $WORKSPACE/litex-boards/litex_boards/targets/soc_basesoc_ulx3s/gateware
$WORKSPACE/ulx3s-examples/bin/ujprog.exe top.bit

cd $WORKSPACE/litex-boards/litex_boards/targets/soc_basesoc_ulx3s/software/bios
litex_term --serial-boot --kernel bios.bin /dev/ttyS15

Press enter, and you should see a litex> prompt. Type reboot As a reminder, if you keep getting an error like this:

ULX2S / ULX3S JTAG programmer v 3.0.92 (built Feb 18 2019 10:55:47)
FT_Open() failed
Cannot find JTAG cable.
Check to make sure NOTHING is using the ULX3S, including perhaps a litex_term or putty session. (yes, I've bumped into that more than once).

A big Thank You to @GregDavill  for these tips on the twitter thread:

The LiteX bios is what you're seeing running.  
By default, LiteX builds this to execute from address 0x00000000. This is an address space inside the FPGA, using blockram. Litex embeds the code inside so it's baked into the bit-stream. 
uart_sync() just waits until internal uart FIFOs are cleared. (Which ensures that printf data  has been sent to the PC...) printf also relies on interrupts, so once you've disable interrupts printf no longer works.

The bios exists to initialise things like SDRAM, which you can see it doing here. It then tries to load a USER program from SD/FLASH/Serial/Ethernet.

According to the timvideos "what is litex" the flterm program is what is needed to interact with the bios. As of the date of this blog, I've included that in the full ULX3S toolchain install.

Beware there's an old implementation of traps on riscv32 that may cause code crashes. (e.g. soft debugging)

I found an example using flterm: This next section is an unsuccessful attempt to upload firmware with flterm. (it just sits there waiting for something)

cd $WORKSPACE/flterm
./flterm --port /dev/ttyS15 --kernel $WORKSPACE/rxrbln-picorv32/firmware/firmware.bin --kernel-adr 0x40000000

Searching for the term "liftoff" and I found two occurrences here and here:
# remote.origin.url=https://github.com/enjoy-digital/litex

# this is the one that gets compiled:
C:\workspace\litex\litex\soc\software\bios\boot.c

# plus this older file:
C:\workspace\litex-buildenv\third_party\litex\litex\soc\software\bios\boot.c


I created a soft_cpu.sh script soon to be pushed to the ulx3s-toolchain setup to illustrate how I created a picorv32 soft CPU on the ULX3S using LiteX. See my next blog on updating the firmware.

Sunday, March 8, 2020

RISC-V Circuit Python on ULX3S starting with the Hacker FOMU as an example

Some notes on setting up a soft RISC-V CPU to run Circuit Python.

I started with the ambitious idea of wanting Circuit Python to work on the Radiona ULX3S. Easily said...

Really short TL;DR this ended up being mostly a blog about the (mysteries and difficulties of installing) toolchain. See this to get started.

TL;DR; Circuit Python is a "C" app that needs a CPU to run on. The Feather M0 is an ARM processor option known to work well with Circuit Python.  We'll need to configure the ECP5 FPGA to be a soft CPU on the ULX3S, as Circuit Python no longer supports the current ESP32 as of version 4, but the ESP32-S2 will be supportedFomu is an FPGA that's had some work towards Circuit Python. There are multiple Fomu versions. Need to first install foboot. Then the rxrbln fork of Claire Wolf's RISC-V toolchain for the ULX3S ECP5. Note make -j$(nproc) build-tools installs all 4 toolchains, when we probably only want riscv32i. There's an open Adafruit issue regarding Fomu port of CircuitPython #2604. Be careful using a hub. Install FPGA toolchain; see this gist and this repo. Note that 4GB is now the minimum RAM to build prjtrellis, 5GB to build nextpnr-ecp5, and at least 30GB disk.

First, I'd like to extend my thanks to Tim "mithro" Ansell for giving me a pair of Hacker Fomu's at Hackaday 2019. I'm so glad I had a chance to meet him. What an awesome guy!

Many of my notes here are quite similar to my previous, multi-part post on setting up a RISC-V on the tinyFPGA-BX.  See also Luke's picosoc example code here.

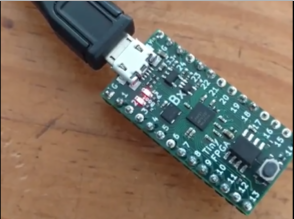
There are multiple FOMU versions. My FOMU that I received from Tim looks like this and is the hacker version, using the bash command export FOMU_REV=hacker:


The Adafruit FOMU (#4332) is the production version:


I started following along the timvideos getting started but didn't have a lot of success.

The tutorial references and links to foboot 1.8.1 (evt-installable.dfu) I eventually noticed in the list of releases and a note that the Hacker version did not have support until Version 1.8.8. Of course it didn't. No fun if it's too easy. :)


I also ordered an even more robust, known-good CircuitPython board, the Adafruit Feather M0 Express. This started me down yet another rabbit hole (specifically this) as the fomu didn't play well when sharing a USB hub.

Also - in my case, for some reason the Ubuntu VM no longer had an IP address after rebooting the host. Apparently others have had the same problem. Indeed I needed to add this to my /etc/network/interfaces after confirming ens33 was the name of my network adapter with the ip address command. Nothing is ever as easy as it is supposed to be. The fun never stops! ;)


# The primary network interface
auto ens33
iface ens33 inet dhcp
confirm that ens33 is the proper device.

Update: it seems that Ubuntu only "forgets" the IP address assignment if the VM is paused. During reboots or initial install - the network interface works properly with no edits to the interface file.

Oh - and more that the default 20GB disk space is needed (40GB is safe, but perhaps as little as 35GB) if doing this in a VM. Ubuntu does not automatically recognize a bigger disk after it has been expanded, so gparted needs to be installed as explained on stackexchange. Simply right-click and select "Resize/Move". Be sure to click on the little green check mark to apply changes.


cd ~

# does dfu-util work?
dfu-util -l

# if "Cannot open DFU device 1209:5bf0" try sudo
sudo dfu-util -l

# can't find dfu-util with sudo?
whereis dfu-util

# here we go
sudo /home/gojimmypi/ecp5-toolchain-linux_x86_64-v1.6.2/bin/dfu-util -l

# upgrade foumu
cd workspace
mkdir fomu
cd fomu
wget https://github.com/im-tomu/foboot/raw/master/releases/v1.8.1/evt-installable.dfu
sudo /home/gojimmypi/ecp5-toolchain-linux_x86_64-v1.6.2/bin/dfu-util -D evt-installable.dfu

If successful, should give output like this:

dfu-util 0.9

Copyright 2005-2009 Weston Schmidt, Harald Welte and OpenMoko Inc.
Copyright 2010-2019 Tormod Volden and Stefan Schmidt
This program is Free Software and has ABSOLUTELY NO WARRANTY
Please report bugs to http://sourceforge.net/p/dfu-util/tickets/

Match vendor ID from file: 1209
Match product ID from file: 5bf0
Opening DFU capable USB device...
ID 1209:5bf0
Run-time device DFU version 0101
Claiming USB DFU Interface...
Setting Alternate Setting #0 ...
Determining device status: state = dfuIDLE, status = 0
dfuIDLE, continuing
DFU mode device DFU version 0101
Device returned transfer size 1024
Copying data from PC to DFU device
Download [=========================] 100%       106814 bytes
Download done.
state(7) = dfuMANIFEST, status(0) = No error condition is present
state(8) = dfuMANIFEST-WAIT-RESET, status(0) = No error condition is present
Done!

To more gracefully setup permissions see the fomu docs. Basically:
# add this line to /etc/udev/rules.d/99-fomu.rules
SUBSYSTEM=="usb", ATTRS{idVendor}=="1209", ATTRS{idProduct}=="5bf0", MODE="0664", GROUP="plugdev"

And then:

sudo groupadd plugdev
sudo usermod -a -G plugdev $USER
id $USER
sudo udevadm control --reload-rules
sudo udevadm trigger

# logoff then back on


Next, we want to have the rxrbln ULX3S version of PicoRV32:
# on a completely new system:
THISRISCV=riscv32i
THIS_RISCV_PATH=/opt/$THISRISCV/bin
MIN_ULX3S_MEMORY=5050000

if [ $(free | grep Mem | awk '{ print $2 }') -lt $MIN_ULX3S_MEMORY ]; then
  echo ""
  echo "System memory found:"
  free
  echo ""
  read -p "Warning, at least $MIN_ULX3S_MEMORY bytes of memory is needed. Press$
fi


sudo apt-get update --assume-yes 
sudo apt-get upgrade --assume-yes
sudo apt-get install git --assume-yes

cd ~
mkdir -p ~/workspace
cd workspace

git clone https://github.com/rxrbln/picorv32.git

cd picorv32

sudo apt-get install make        --assume-yes
sudo apt-get install make-guile  --assume-yes
sudo apt-get install libgmp3-dev --assume-yes
sudo apt-get install libmpfr-dev --assume-yes
sudo apt-get install libmpc-dev  --assume-yes

sudo apt-get install autoconf automake autotools-dev curl libmpc-dev \
        libmpfr-dev libgmp-dev gawk build-essential bison flex texinfo \
    gperf libtool patchutils bc zlib1g-dev git libexpat1-dev --assume-yes


make download-tools

# install *all four* riscv flavor toolchains:
# make -j$(nproc) build-tools

# or install only riscv32i:
sudo mkdir /opt/riscv32i
sudo chown $USER /opt/riscv32i

git clone https://github.com/riscv/riscv-gnu-toolchain riscv-gnu-toolchain-rv32i
cd riscv-gnu-toolchain-rv32i
git checkout 411d134

# if you see fatal: clone of 'git://  ... 
# users sitting behind a firewall may need these:
git config --global url.https://github.com/.insteadOf git://github.com/
git config --global url.https://git.qemu.org/git/.insteadOf git://git.qemu-project.org/
git config --global url.https://anongit.freedesktop.org/git/.insteadOf git://anongit.freedesktop.org/
git config --global url.https://github.com/riscv.insteadOf git://github.com/riscv

# this next statement takes a long time. be patient:
git submodule update --init --recursive

mkdir build; cd build
../configure --with-arch=rv32i --prefix=/opt/riscv32i
make -j$(nproc)

# see if it is working:
/opt/riscv32i/bin/riscv32-unknown-elf-gcc --version

# add to path
if [ "$(cat ~/.bashrc | grep  $THIS_RISCV_PATH)" == "" ]; then
  echo PATH=$PATH:$THIS_RISCV_PATH >> ~/.bashrc
  echo "~/.bashrc updated with this line:"
  echo PATH=$PATH:$THIS_RISCV_PATH
else
  echo "Found $THIS_RISCV_PATH in ~/.bashrc - path not changed."
fi

if [ "$(echo $PATH | grep  $THIS_RISCV_PATH)" == "" ]; then
  export PATH=$PATH:$THIS_RISCV_PATH
  echo "Updated current path: $PATH"
else
  echo "Path not updated. PATH=$PATH"
fi

cd ~/workspace
git clone https://gist.github.com/gojimmypi/f96cd86b2b8595b4cf3be4baf493c5a7 ulx3s_fpga_toolchain
cd ulx3s_fpga_toolchain
chmod +x ULX3S_WSL_Toolchain.sh
./ULX3S_WSL_Toolchain.sh


Run scripts with the source command if you don't want to start a new shell, or manually set path. You may wish to put this line at the end of your ~/.bashrc file:
#add path to riscv32i compiler
PATH=/opt/riscv32i/bin:$PATH

Once the RISC-V toolchain is installed, there's some sample code in the picosoc directory. Fortunately rxrbln has already made some modifications in the Makefile for the ULX3S. The C code is compiled with:

make ulx3s_fw.img


To upload the code to the ULX3S:

make ulx3sprog


Note from the Makefile there are 2 key steps: #1 to put the ulx3s.bit soft CPU onto the FPGA, then #2 put the firmware into FLASH memory:
/usr/src/f32c-ujprog/ujprog/ujprog -j FLASH -f 0x200000 ulx3s_fw.img
/usr/src/f32c-ujprog/ujprog/ujprog -t ulx3s.bit # -j FLASH 


The default install directory for ujprog is /usr/local/bin/ujprog however the rxrbln Makefile expects it to be /usr/src/f32c-ujprog/ujprog/ujprog
so we'll just create a quick symlink
sudo mkdir -p /usr/src/f32c-ujprog/ujprog/
sudo ln -s /usr/local/bin/ujprog /usr/src/f32c-ujprog/ujprog/ujprog
yosys/nextpnr/ https://gist.github.com/gojimmypi/243fc3a6eead72ae3db8fd32f2567c96


In the end, I put together a full ULX3S toolchain installer. Next blog I go into details of actually getting the soft CPU and RISC-V code onto the ULX3S.


Other stuff:

TODO - do we really want a 2+ year old RV32I toolchain? (note git checkout 411d134)


 * https://workshop.fomu.im/en/latest/

See also:

A cobbled-together profiler for CircuitPython.

Sunday, February 3, 2019

Reinstalling WSL Ubuntu (prep for TinyFPGA RISC-V toolchain)

In my prior blogs, I wrote about the difficulties I encountered in using WSL for the TinyFPGA Verilog tool chain.

TL;DR - Run wslconfig /u Ubuntu in a DOS command prompt. WSL may need to be manually deleted by uninstalling and removing the CanonicalGroupLimited.Ubuntu{...} directory in %USERPROFILE%\AppData\Local\Packages\. Uninstall the Windows "Apps & Features" Ubuntu app, then visit https://aka.ms/wslstore
and re-install Ubuntu app.

As a reminder, do not modify WSL filesystem file from Windows! Yes, I've seen some pretty weird things happen when I tested that. But feel free to edit any other files. For instance, the entire C:\ directory is available in WSL as /mnt/c/.

As it turns out, the biggest problem was the version of Ubuntu I had. Although I didn't think I had it installed for all that long - it was way outdated. 

The first thing to do: completely wipe out the old Ubuntu. I found some instructions on removing Ubuntu - that included both of these options:

From DOS Prompt:
lxrun /uninstall /full
or also from DOS Prompt:
DEL /S %localappdata%\lxss\
I didn't have the lxrun command, nor a C:\Users\gojimmypi\AppData\Local\lxss directory. I tried DOS command prompt, a powershell prompt, the Windows bash prompt (C:\Windows\system32\bash.exe) and Ubuntu prompt. Indeed according to Microsoft, lxrun is deprecated as of Windows 10 1803 and later. As noted in a prior blog, my Ubuntu was installed in this directory:
C:\Users\gojimmypi\AppData\Local\Packages\CanonicalGroupLimited.UbuntuonWindows_79rhkp1fndgsc\LocalState\rootfs\home\gojimmypi
To help find it, you can run a command like this in your WSL instance:
echo wow > ~/zowie.tag
then from a DOS command-prompt:
C:\Users\gojimmypi>dir zowie.tag /s
 Volume in drive C is Windows
 Volume Serial Number is 9078-2015

 Directory of C:\Users\gojimmypi\AppData\Local\Packages\CanonicalGroupLimited.UbuntuonWindows_79rhkp1fndgsc\LocalState\rootfs\home\gojimmypi

02/03/2019  01:43 PM                 4 zowie.tag
               1 File(s)              4 bytes


So in my case, Ubuntu needed to be removed from

 C:\Users\gojimmypi\AppData\Local\Packages\CanonicalGroupLimited.UbuntuonWindows_79rhkp1fndgsc

I was reluctant to try the brute-force directory deletion  route. In part, I've seen where Windows did not "see" the proper file sizes and permissions. I eventually found the wslconfig command.

del CanonicalGroupLimited.UbuntuonWindows_79rhkp1fndgsc /s /q > null:wslconfig /list
pause
wslconfig /unregister distroname


That didn't go so well:

And it didn't just fail, but corrupted the install:

Sometimes I really wonder why I continue to fuss with the Microsoft environment. :/

So in the end, I ran the brute-force directoy delete like this:
del CanonicalGroupLimited.UbuntuonWindows_79rhkp1fndgsc /s /q > null:
wslconfig /unregister distroname
The /s deletes all subdirectories. The /q is "quiet mode" (don't confirm every directory to delete), and I send output to null: as the RISC-V toolchain is massive, and showing all that on the screen would take forever. That actually didn't work, either - leaving behind a ton of directories. So then I tried:
rmdir CanonicalGroupLimited.UbuntuonWindows_79rhkp1fndgsc /s /q
which also did not work, giving an error: CanonicalGroupLimited.UbuntuonWindows_79rhkp1fndgsc\LOCALS~1\rootfs\lib\recovery-mode - The directory is not empty. So I continued to manually delete directories manually until everything was gone. Running WSL from a DOS command prompt shows that nothing is installed:

So on to installing Ubuntu fresh from the Microsoft Store - Linux on Windows upon launching the Ubuntu, we should be able to confirm we have version 18.04 installed:
Installing, this may take a few minutes...
Please create a default UNIX user account. The username does not need to match your Windows username.
For more information visit: https://aka.ms/wslusers
Enter new UNIX username: gojimmypi
Enter new UNIX password:
Retype new UNIX password:
passwd: password updated successfully
Installation successful!
To run a command as administrator (user "root"), use "sudo ".
See "man sudo_root" for details.

gojimmypi@HOSTNAME:~$ lsb_release -a
No LSB modules are available.
Distributor ID: Ubuntu
Description:    Ubuntu 18.04.1 LTS
Release:        18.04
Codename:       bionic

You may wish to setup a custom bash prompt like mine (or see bashrcgenerator.com).


Finally on to installing the tool chain again. I've created a TinyFPGA install gist:
mkdir -p ~/workspace/
cd ~/workspace/
git clone https://gist.github.com/243fc3a6eead72ae3db8fd32f2567c96.git TinyFPGA_Toolchain
cd TinyFPGA_Toolchain
chmod +x TinyFPGA_Toolchain.sh
sudo ./TinyFPGA_Toolchain.sh

Or if you prefer:
sudo ls # pause if copy/paste password prompt
sudo apt-get update --assume-yes
sudo apt-get upgrade --assume-yes

mkdir -p ~/workspace/

cd ~/workspace/
# install icestorm dependencies
# this next install needs a bit of disk space:
#   0 upgraded, 205 newly installed, 0 to remove and 3 not upgraded.
#   Need to get 130 MB of archives.
#   After this operation, 652 MB of additional disk space will be used.
#
sudo apt-get install build-essential clang bison flex libreadline-dev \
                     gawk tcl-dev libffi-dev git mercurial graphviz   \
                     xdot pkg-config python python3 libftdi-dev  --assume-yes

# tinyFPGA BX
git clone --recursive https://github.com/tinyfpga/TinyFPGA-BX.git
cd ~/workspace/

# icestorm
git clone https://github.com/cliffordwolf/icestorm.git icestorm
cd icestorm
make -j$(nproc)
sudo make install
cd ~/workspace/

# arachne-pnr
git clone https://github.com/cseed/arachne-pnr.git arachne-pnr
cd arachne-pnr
make -j$(nproc)
sudo make install
cd ~/workspace/

# nextpnr
git clone https://github.com/YosysHQ/nextpnr.git
# this next line is about another half gig of files!
#   0 upgraded, 249 newly installed, 0 to remove and 3 not upgraded.
#   Need to get 132 MB of archives.
#   After this operation, 623 MB of additional disk space will be used.
#
sudo apt-get install libboost-all-dev python3-dev qt5-default clang-format

cd nextpnr
cmake -DARCH=ice40 .
make -j$(nproc)
sudo make install
cd ~/workspace/

# yosys
git clone https://github.com/cliffordwolf/yosys.git yosys
cd yosys
make -j$(nproc)
sudo make install
cd ~/workspace/

#RISC-V
git clone https://github.com/cliffordwolf/picorv32.git

sudo mkdir /opt/riscv32i
sudo chown $USER /opt/riscv32i

sudo apt-get install autoconf automake autotools-dev curl libmpc-dev \
        libmpfr-dev libgmp-dev gawk build-essential bison flex texinfo \
    gperf libtool patchutils bc zlib1g-dev git libexpat1-dev  --assume-yes

        Follow @gojimmypi  

Sunday, January 27, 2019

RISC-V on tinyFPGA-BX via WSL with nextpnr - Part 3

After getting the tinyFPGA working with the yosys / Arachne-PNR / icestorm toolchain as noted in my prior blog, I wanted to try out NextPNR (the Arachne-PNR replacement). This turned out to be a bit of a bumpy ride. Yes, I know it's no fun if it is too easy, but I wonder if I'm approaching my maximum fun capacity? (spoiler: no, this is awesome!)

TL;DR. WSL Ubuntu 16.04 or later is needed. There's a known problem with NextPNR that prohibits the GUI version from compiling. The tinyFPGA has a iCE40LP8K-CM81; two parameters required: --lp8k and --package cm81. The iCEstick has a iCE40HX-1k on board.


First, it seemed that everything I had was the wrong version. apt-get update / upgrade does not really update as much as one might like. So I first updated CMake and Python:

cmake --version
sudo apt-get remove cmake
sudo apt-get install cmake3

sudo apt-get remove 'python3.*'
sudo apt-get install python3.5-dev


Next, I encountered a boost issue, similar to nextpnr issue 129 - cmake: "Could NOT find Boost -- Boost version: 1.58.0". Then I had this annoying problem where cmake Could NOT find PythonInterp: (even though Python 3.5.2 is installed). The problem here was simply that I ran CMake before having the proper version of dependencies installed and the error was cached in CMakeCache.txt !! Simply removing (or renaming) the file resolved that - however, I then encountered yet another boot problem (issue 215: CheckSymbolExists.c:(.text+0x16): undefined reference to `pthread_create'). This one turned out to be that I had Ubuntu 14.04 and needed something newer (thanks to @daveshah1 for pointing this out) - despite the icestorm tools explicitly naming Ubuntu 14.04

Here's how I upgraded my WSL Ubuntu to the latest version (16.04):
sudo ls # pause if copy/paste for password prompt
sudo apt-get update --assume-yes
sudo apt-get upgrade --assume-yes
sudo apt-get install update-manager-core  --assume-yes
sudo do-release-upgrade
sudo apt-get update
sudo apt-get dist-upgrade

# doing this wiped out CMake, so I had to reinstall:
wget http://www.cmake.org/files/v3.13/cmake-3.13.3.tar.gz
tar xf cmake-3.13.3.tar.gz
cd cmake-3.13.3
./configure
make
sudo make install
cmake --version

# pip was also wiped out (despite Python 3.6 being listed for tinyFBGA install, tinyprog is installed with pip, not pip3)
sudo apt-get install python3-pip
sudo apt-get install python-pip
Then install the nextpnr dependencies:
sudo apt-get update
sudo apt-get upgrade
sudo apt-get install libboost-all-dev
sudo apt-get install python3-dev
sudo apt-get install qt5-default
sudo apt-get install clang-format
My final, working Makefile for getting the picosoc RISC-V example onto the tinyFPGA looks like this:
upload: hardware.bin firmware.bin
        tinyprog --com /dev/ttyS8 -p hardware.bin -u firmware.bin


hardware.blif: hardware.v spimemio.v simpleuart.v picosoc.v picorv32.v
        yosys -ql hardware.log -p 'synth_ice40 -top hardware -blif hardware.blif -json hardware.json ' $^

hardware.asc: hardware.pcf hardware.blif
        # arachne-pnr -r -d 8k -P cm81 -o hardware.asc -p hardware.pcf hardware.blif
        nextpnr-ice40 --lp8k --package cm81 --json hardware.json --pcf hardware.pcf --asc hardware.asc

hardware.bin: hardware.asc
        icetime -d hx8k -c 12 -mtr hardware.rpt hardware.asc
        icepack hardware.asc hardware.bin


firmware.elf: sections.lds start.S firmware.c
        /opt/riscv32ic/bin/riscv32-unknown-elf-gcc -march=rv32imc -nostartfiles -Wl,-Bstatic,-T,sections.lds,--strip-debu$
firmware.bin: firmware.elf
        /opt/riscv32ic/bin/riscv32-unknown-elf-objcopy -O binary firmware.elf /dev/stdout > firmware.bin


clean:
        rm -f firmware.elf firmware.hex firmware.bin firmware.o firmware.map \
              hardware.blif hardware.log hardware.asc hardware.rpt hardware.bin

What versions are installed?
lsb_release -a
python --version
python3.5 --version
cmake --version
clang --version
echo qtf_default $(apt-cache show qt5-default | grep -m1 Version)
echo libboost-all-dev $(apt-cache show libboost-all-dev | grep -m1 Version)

for pk in build-essential clang bison flex libreadline-dev \
          gawk tcl-dev libffi-dev git mercurial graphviz   \
          xdot pkg-config python python3 libftdi-dev \
          qt5-default python3-dev libboost-dev; \
  do echo "$pk" $(apt-cache show "$pk" | grep -m1 Version); done

nextpnr-ice40 --version
yosys -V
/opt/riscv32ic/bin/riscv32-unknown-elf-gcc -v
pip --version
echo apio [pip]      $(pip  list | grep apio)
echo apio [pip3]     $(pip3 list | grep apio)
echo tinyprog [pip]  $(pip  list | grep tinyprog)
echo tinyprog [pip3] $(pip3 list | grep tinyprog)
Once nextpnr is all compiled, then next thing is to run it in GUI mode! So far, I have been unsuccessful here. At first, I tried to use the MingX, in the same way I did for my OpenWRT / Wireshark exercise. Despite working just fine on an older Ubuntu 14.4, this new 16.4 simply refused to play.

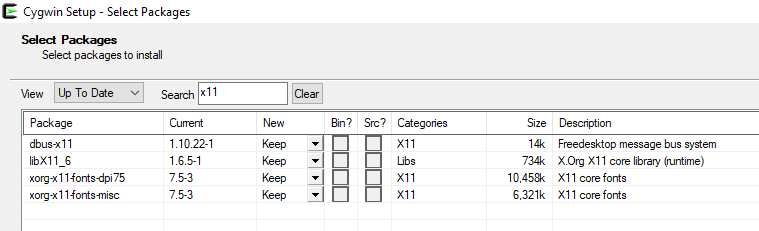
So instead, I tried CygWin/X - I fussed with it for quite some time before I eventually found a useful hint. First, run Cygwin installer. I selected all of the "X11" and "Xorg" items:


Next, in WSL:
export DISPLAY=:0 # you may wish you put in this your ~/.bashrc
The hint I found was that that I needed to start cygwin X-Server like this:
C:\cygwin64\bin\run.exe --quote /usr/bin/bash.exe -l -c "cd; exec /usr/bin/startxwin -- -listen tcp"
Specifically adding that -- -listen tcp command-line parameter. I also needed to copy the .Xauthority file from my cygwin home, to my WSL home. (yes, I know this is getting more kludgey with each step):
cp /mnt/c/cygwin64/home/gojimmypi/.Xauthority  .Xauthority
without doing this, I had an Authorization error like this:
$ xclock
Authorization required, but no authorization protocol specified
Error: Can't open display: :0
The xclock test works just fine: no errors. I'm able to get wireshark to run but I do see some warnings.
Sadly, nextpnr will not launch at all:
$ nextpnr-ice40 --gui
Could not initialize OpenGL for RasterGLSurface, reverting to RasterSurface.
Could not initialize GLX
Aborted (core dumped)
I tried using the export LIBGL_USE_WGL=1 as suggested here, but no change in outcome. I tried the glxinfo | grep OpenGL, but didn't have it installed. Next:
sudo apt-get install mesa-utils
glxinfo | grep OpenGL
This resulted in a new error: Error: couldn't find RGB GLX visual or fbconfig. I then tried to install more of the OpenGL stuff as suggested here. (no change in results)
sudo apt-get install libglu1-mesa-dev freeglut3-dev mesa-common-dev
Still no joy. I'm happy to have nextpnr working in command-line mode, and have successfully used it with the RISC-V on the TinyFPGA instead of Arachne-PNR, but I would have really like to have been able to see the GUI.

Friday, January 4, 2019

RISC-V on FPGA (the tinyFPGA) via WSL - Part 2

In my previous blog, I wrote about the problems I encountered with programming the tinyFPGA BX in the Windows Subsystem for Linux (WSL). Now that I have that resolved, onto something much more interesting: installing the RISC-V (specifically the PicoRV32) soft CPU onto the tinyFPGA board!

TL;DR - be sure to install all dependencies for WSL. Edit Makefile to call explicit RISC-V compiler (or edit path) and explicitly name the serial port tinyFPGA is plugged into. Use the -r option for arachne-pnr. Be sure to have plenty of disk space (and patience, or a really fast computer)

Now, this is something well outside of my skill set and comfort zone: A soft CPU on an FPGA! Fortunately, Luke posted this awesome RISC-V example project on TinyFPGA BX on the tinyFPGA discourse forum that seemed to be fairly straightforward. The target environment was a "real" Linux machine, I chose WSL, instead.

Note that as of the date of this blog, there are several useful, but not-yet-merged PR's for the tinyFPGA BX repo that are probably useful to review.

I keep all my projects in a /workspace directory, so my tinyFPGA BX clone looks like this:
gojimmypi@MYHOST : ~
0 $ cd ~/workspace
gojimmypi@MYHOST : ~/workspace
0 $ git clone --recursive https://github.com/tinyfpga/TinyFPGA-BX.git
Cloning into 'TinyFPGA-BX'...
remote: Enumerating objects: 108, done.
remote: Total 108 (delta 0), reused 0 (delta 0), pack-reused 108
Receiving objects: 100% (108/108), 648.10 KiB | 250.00 KiB/s, done.
Resolving deltas: 100% (19/19), done.
Checking connectivity... done.
gojimmypi@MYHOST : ~/workspace
See the icestorm install from TinyFPGA-BX icestorm template; I clone all of my GitHub stuff into my ~/workspace directory:
cd ~/workspace/
# install icestorm dependencies
sudo apt-get install build-essential clang bison flex libreadline-dev \
                     gawk tcl-dev libffi-dev git mercurial graphviz   \
                     xdot pkg-config python python3 libftdi-dev

# tinyFPGA BX
git clone --recursive https://github.com/tinyfpga/TinyFPGA-BX.git
cd ~/workspace/

# icestorm
git clone https://github.com/cliffordwolf/icestorm.git icestorm
cd icestorm
make -j$(nproc)
sudo make install
cd ~/workspace/

# arachne-pnr
git clone https://github.com/cseed/arachne-pnr.git arachne-pnr
cd arachne-pnr
make -j$(nproc)
sudo make install
cd ~/workspace/

# yosys
git clone https://github.com/cliffordwolf/yosys.git yosys
cd yosys
make -j$(nproc)
sudo make install
cd ~/workspace/

# picorv32
git clone https://github.com/cliffordwolf/picorv32.git

# see online instructions https://github.com/cliffordwolf/picorv32/blob/master/README.md#building-a-pure-rv32i-toolchain
#
Note that I encountered a permission error for the make download-tools :
Checking connectivity... done.
+ mv /var/cache/distfiles/riscv-gcc.git.part /var/cache/distfiles/riscv-gcc.git
mv: cannot move ‘/var/cache/distfiles/riscv-gcc.git.part’ to ‘/var/cache/distfiles/riscv-gcc.git’: Permission denied
make: *** [download-tools] Error 1
So consider using: sudo make download-tools Note that after I encountered the permission error, even the sudo version returned an error (I think the data was not re-created, rather used existing downloads)... so in order to fix it, I needed to manually adjust permissions:
sudo chmod 666 /var/cache/distfiles/riscv-gcc.git.part
sudo mv /var/cache/distfiles/riscv-gcc.git.part /var/cache/distfiles/riscv-gcc.git

I ended up encountering yet another odd error as well, this GitHub Connection refused:
Submodule 'riscv-qemu' (git://github.com/riscv/riscv-qemu.git) registered for path 'riscv-qemu'
Cloning into 'riscv-qemu'...
fatal: unable to connect to github.com:
github.com[0: 192.30.255.113]: errno=Connection refused
github.com[1: 192.30.255.112]: errno=Connection refused

Clone of 'git://github.com/riscv/riscv-qemu.git' into submodule path 'riscv-qemu' failed
make[1]: *** [build-riscv32i-tools-bh] Error 1
make[1]: Leaving directory `/home/gojimmypi/workspace/picorv32'
make: *** [build-tools] Error 2
I opened a GitHub issue cliffordwolf/picorv32 #106 for this. In short, for some reason my WSL decided to have some sort of "git port is restricted" error for git://. The fix as noted in the issue was:
git config --global url.https://github.com/.insteadOf git://github.com/
To undo this:
git config --global --unset url.https://github.com/.insteadOf
If you prefer to not do this on a global scale, simply remove the --global.

As I was trying to to this in WSL instead of a "real" Linux environment, I stumbled a bit. First - the RISC-V toolchain did not compile - instead ending in a simple "recipe for 'build-tools' failed". Early on in the process, this error was encountered:
checking for the correct version of gmp.h... no
configure: error: Building GCC requires GMP 4.2+, MPFR 2.4.0+ and MPC 0.8.0+.
Try the --with-gmp, --with-mpfr and/or --with-mpc options to specify
their locations.  Source code for these libraries can be found at
their respective hosting sites as well as at
ftp://gcc.gnu.org/pub/gcc/infrastructure/.  See also
http://gcc.gnu.org/install/prerequisites.html for additional info.  If
you obtained GMP, MPFR and/or MPC from a vendor distribution package,
make sure that you have installed both the libraries and the header
files.  They may be located in separate packages.
yes
checking whether stdint.h conforms to C99... Makefile:415: recipe for target 'stamps/build-gcc-newlib-stage1' failed
make[2]: *** [stamps/build-gcc-newlib-stage1] Error 1
make[2]: *** Waiting for unfinished jobs....

It is unfortunate that the build attempt continued, as it takes an incredibly long time on my machine. Eventually it returned with:
make[2]: Leaving directory '/home/gojimmypi/workspace/picorv32/riscv-gnu-toolchain-riscv32i/build'
Makefile:154: recipe for target 'build-riscv32i-tools-bh' failed
make[1]: *** [build-riscv32i-tools-bh] Error 2
make[1]: Leaving directory '/home/gojimmypi/workspace/picorv32'
Makefile:160: recipe for target 'build-tools' failed
make: *** [build-tools] Error 2
A quick google search and I found this helpful how-to on stackoverflow. Although a bit detailed and verbose, the only information I needed was in the sentence:
For Debian based system including Ubuntu, Install libgmp-dev, libmpfr-dev and libmpc-dev packages.
For my Ubuntu-like WSL this translated to:

sudo apt-get install libgmp3-dev --assume-yes
sudo apt-get install libmpfr-dev --assume-yes
sudo apt-get install libmpc-dev  --assume-yes
(TODO: do I need libgmp3-dev or simply libgmp-dev ?)

Update: the TL;DR instructions on simply running the TL;DR Building a pure RV32I Toolchain like this:
make download-tools 
make -j$(nproc) build-tools 

...does not include downloading all of the dependencies. So first use the install shown a few lines down:
sudo apt-get install autoconf automake autotools-dev curl libmpc-dev \
        libmpfr-dev libgmp-dev gawk build-essential bison flex texinfo \
    gperf libtool patchutils bc zlib1g-dev git libexpat1-dev

After that, the build was successful! However, I was still not able to actually call the compiler:
/usr/bin/install -c -m 644 b-header-vars /opt/riscv32imc/lib/gcc/riscv32-unknown-elf/8.2.0/plugin/include/b-header-vars
make[5]: Leaving directory '/home/gojimmypi/workspace/picorv32/riscv-gnu-toolchain-riscv32imc/build/build-gcc-newlib-stage2/gcc'
make[4]: Leaving directory '/home/gojimmypi/workspace/picorv32/riscv-gnu-toolchain-riscv32imc/build/build-gcc-newlib-stage2'
make[3]: Leaving directory '/home/gojimmypi/workspace/picorv32/riscv-gnu-toolchain-riscv32imc/build/build-gcc-newlib-stage2'
mkdir -p stamps/ && touch stamps/build-gcc-newlib-stage2
make[2]: Leaving directory '/home/gojimmypi/workspace/picorv32/riscv-gnu-toolchain-riscv32imc/build'
make[1]: Leaving directory '/home/gojimmypi/workspace/picorv32'
gojimmypi@MYHOST : ~/workspace/picorv32
0 $ riscv32-unknown-elf-gcc
riscv32-unknown-elf-gcc: command not found
Fortunately this was a simple matter of the command not being in the path. I started a fresh WSL instance to be sure, and indeed it was not added to my path. So I manually edited Luke's Makefile to explicitly name the path. I searched from it in DOS, and found several of them in each of these directories (just as described in the instructions):
 Directory of C:\Users\gojimmypi\AppData\Local\Packages\CanonicalGroupLimited.UbuntuonWindows_79rhkp1fndgsc\LocalState\rootfs\opt

01/03/2019  07:47 PM    <DIR>          riscv32i
01/03/2019  09:08 PM    <DIR>          riscv32ic
01/03/2019  10:26 PM    <DIR>          riscv32im
01/03/2019  11:47 PM    <DIR>          riscv32imc
               0 File(s)              0 bytes
In particular, look at those creation dates! The full monty compile took quite a long time on my system. Together, the 4 of them take up over 3GB of disk space in the /opt directory! I'm not sure how accurate that is - as when going to the parent directory in Windows:
C:\Users\gojimmypi\AppData\Local\Packages\CanonicalGroupLimited.UbuntuonWindows_79rhkp1fndgsc\LocalState
The .\LocalState\rootfs directory is less than 2 GB, despite .\LocalState\rootfs\opt containing over 3GB. The reality is that somehow after this exercise, overall my disk has nearly 20GB less free space. :/

Here's what the rootfs directory looks like in Windows File Explorer (rick-click, properties)

However when running this command (note that I piped it to a file, which is much faster than sending 65MB to the screen):
dir C:\Users\gojimmypi\AppData\Local\Packages\CanonicalGroupLimited.UbuntuonWindows_79rhkp1fndgsc\LocalState\rootfs\ /s > myWSL_rootfs.txt
The resultant file size is considerably larger than reported in Windows Explorer:
     Total Files Listed:
           933087 File(s) 31,192,151,953 bytes
           125544 Dir(s)   5,549,752,320 bytes free
Note my local picorv32 from github ended up here on my Windows file system:
C:\Users\gojimmypi\AppData\Local\Packages\CanonicalGroupLimited.UbuntuonWindows_79rhkp1fndgsc\LocalState\rootfs\home\gojimmypi\workspace\picorv32
It appears as /home/gojimmypi/workspace/picorv32 in WSL:
gojimmypi@MYHOST : ~/workspace/picorv32
0 $ pwd
/home/gojimmypi/workspace/picorv32
gojimmypi@MYHOST : ~/workspace/picorv32
0 $ ls
dhrystone  picorv32.core  README.md                      riscv-gnu-toolchain-riscv32im   showtrace.py    testbench.v
firmware   picorv32.v     riscv-gnu-toolchain-riscv32i   riscv-gnu-toolchain-riscv32imc  testbench.cc    testbench_wb.v
Makefile   picosoc        riscv-gnu-toolchain-riscv32ic  scripts                         testbench_ez.v  tests
gojimmypi@MYHOST : ~/workspace/picorv32
0 $
And sure enough: a whopping 20GB!
gojimmypi@MYHOST : ~/workspace/picorv32
0 $ du -h
...
4.9G    ./riscv-gnu-toolchain-riscv32imc
20K     ./scripts/csmith
24K     ./scripts/cxxdemo
16K     ./scripts/icestorm
16K     ./scripts/presyn
32K     ./scripts/quartus
28K     ./scripts/romload
56K     ./scripts/smtbmc
12K     ./scripts/tomthumbtg
40K     ./scripts/torture
36K     ./scripts/vivado
8.0K    ./scripts/yosys
12K     ./scripts/yosys-cmp
300K    ./scripts
205K    ./tests
20G     .
One more thing for future reference: I was not starting with a clean WSL. I don't know if anything I had previously installed was also a missing requirement. Using history | grep "sudo apt-get install", I found that I had previously manually installed these items:
sudo apt-get install gdb
sudo apt-get install libdevice-serialport-perl
sudo apt-get install libyaml-perl
sudo apt-get install binutils
sudo apt-get install build-essential clang bison flex libreadline-dev      
sudo apt-get install gawk tcl-dev libffi-dev git mercurial graphviz
sudo apt-get install xdot pkg-config python python3 libftdi-dev
sudo apt-get install libtool
sudo apt-get install automake
sudo apt-get install make unrar-free autoconf automake libtool gcc g++ gperf
sudo apt-get install flex bison texinfo gawk ncurses-dev libexpat-dev python-dev python python-serial
sudo apt-get install sed git unzip bash help2man wget bzip2
sudo apt-get install lzip
sudo apt-get install extract
sudo apt-get install cu
sudo apt-get install setserial
sudo apt-get install libgmp3-dev
sudo apt-get install libmpfr-dev
sudo apt-get install libmpc-dev
If for some reason you want to install all of these as well:
sudo apt-get install gdb \
                     libdevice-serialport-perl \
                     libyaml-perl \
                     binutils \
                     build-essential clang bison flex libreadline-dev \
                     gawk tcl-dev libffi-dev git mercurial graphviz \
                     xdot pkg-config python python3 libftdi-dev \
                     libtool \
                     automake \
                     make unrar-free autoconf automake libtool gcc g++ gperf \
                     flex bison texinfo gawk ncurses-dev libexpat-dev python-dev python python-serial \
                     sed git unzip bash help2man wget bzip2 \
                     lzip \
                     extract \
                     cu \
                     setserial \
                     libgmp3-dev \
                     libmpfr-dev \
                     libmpc-dev 
Back to calling the compiler: here are the lines I edited in the Makefile to explicitly call the RISC-V compiler I wanted:
firmware.elf: sections.lds start.S firmware.c 
 /opt/riscv32i/bin/riscv32-unknown-elf-gcc -march=rv32imc -nostartfiles -Wl,-Bstatic,-T,sections.lds,--strip-debug,-Map=firmware.map,--cref  -ffreestanding -nostdlib -o firmware.elf start.S firmware.c

firmware.bin: firmware.elf
 /opt/riscv32i/bin/riscv32-unknown-elf-objcopy -O binary firmware.elf /dev/stdout > firmware.bin
One of the things I wondered: once the RISC-V processor is created on the FPGA chip... how to I get it to actually run code that I create? Is there a special "soft-JTAG" created? A "soft-UART"? If so, which pins would be used? Perhaps some sort of bootloader? As it turns out... none of those; the solution is quite simple, thanks to some clever work by Luke when implementing his tinyFPGA board. When using the tinyprog command-line tool, in addition to the -p to program the FPGA, there's a -u option to also upload firmware! And yes - this is the firmware code that the soft RISC-V CPU will execute. Brilliant! Ok, perhaps not the most efficient to recreate the entire CPU when the app changes, but it is certainly easy.

So the "app" that gets compiled by the new RISC-V toolchain is the firmware found here. So ok, clearly there are several un-intuitive things going on there. But it is an excellent template to get started and to learn a tremendous amount this RISC-V implementation in Verilog on an FPGA.

At this point, if the tinyFPGA dependencies are not installed per the TinyFPGA BX User Guide, these commands are needed in WSL (note that indeed Python was pre-installed, but pip was not):
sudo apt-get install python-pip
sudo pip install apio==0.4.0b5 tinyprog
apio install system scons icestorm iverilog
sudo apio drivers --serial-enable
As noted in my previous blog, there were some problems in WSL talking to my tinyFPGA board. Specifically, unlike in DOS, the tinyprog tool does not automatically find my tingFPGA board. Thus another minor change was needed to the Makefile. My tinyFPGA board appears as COM15: in Windows... thus /dev/ttyS15 in WSL. So for the upload part, I changed my Makefile to explicitly name that port:
upload: hardware.bin firmware.bin
        tinyprog --com /dev/ttyS15 -p hardware.bin -u firmware.bin
Also: note that once uploaded, the tinyFPGA powers on into "bootloader mode". Pressing reset apparently returns it to boot loader mode as well. That would seem rather unfortunate for any actual in-the-field projects. I wonder if there's some way to not power on like that?

In order to exit bootloader mode, I use this command:
tinyprog -b -c /dev/ttyS15

Unless you want to run as sudo, I ended up having to adjust the permissions. This command did *not* work for me:
sudo usermod -a -G dialout $USER
Apparently there's an issue with WSL dev/tty permissions so instead I used:
sudo chmod 0666 /dev/ttyS15

When I first plugged in my tinyFPGA, Windows gave the "We're setting up 'Unknown Device'" message. Upon completion, the tinyFPGA did not appear. Unplugging and reinserting resolved this for me. Note that in order to program the tinyFPGA, we do need to be in bootloader mode (press reset on tinyFPGA), otherwise we'll see an error like this:
0 $ make upload
tinyprog --com /dev/ttyS15 -p hardware.bin -u firmware.bin

    TinyProg CLI
    ------------
    Using device id 1d50:6130
Traceback (most recent call last):
  File "/home/gojimmypi/.local/bin/tinyprog", line 11, in 
    sys.exit(main())
  File "/home/gojimmypi/.local/lib/python2.7/site-packages/tinyprog/__main__.py", line 325, in main
    with active_port:
  File "/home/gojimmypi/.local/lib/python2.7/site-packages/tinyprog/__init__.py", line 66, in __enter__
    self.ser = serial.Serial(self.port_name, timeout=1.0, writeTimeout=1.0).__enter__()
  File "/home/gojimmypi/.local/lib/python2.7/site-packages/serial/serialutil.py", line 240, in __init__
    self.open()
  File "/home/gojimmypi/.local/lib/python2.7/site-packages/serial/serialposix.py", line 268, in open
    raise SerialException(msg.errno, "could not open port {}: {}".format(self._port, msg))
serial.serialutil.SerialException: [Errno 5] could not open port /dev/ttyS15: [Errno 5] Input/output error: '/dev/ttyS15'
Makefile:3: recipe for target 'upload' failed
make: *** [upload] Error 1
Also note that I was unable to use the riscv32ic, riscv32ic, or riscv32icm toolchains resulting in errors like this:
...
  pass 198, 1 shared.
  pass 199, 1 shared.
  pass 200, 1 shared.
fatal error: failed to route
Makefile:10: recipe for target 'hardware.asc' failed
make: *** [hardware.asc] Error 1
So unless you know you need those other toolchains for other RISC-V stuff, perhaps best to not waste time (and disk space!) compiling them all.

Note that afterwards, I found that even riscv32i was not working! Upon reinstalling the icestorm toolchain, this was resolved - and I was able to use all 4 of the riscv32i[c][m] flavors.

Here is what I did to rebuild the icestorm / arachne-pnr / yosys toolchain:
# capture copy/paste with an initial sudo command
cd ~/workspace/
sudo ls 

# ensure dependencies are fresh
sudo apt-get update
sudo apt-get upgrade

cd ~/workspace/
# tinyFPGA BX
cd TinyFPGA-BX
git fetch
git pull
cd ~/workspace/

# icestorm
cd icestorm
git fetch
git pull
make clean
make -j$(nproc)
sudo make install
cd ~/workspace/

# arachne-pnr
cd arachne-pnr
git fetch
git pull
make clean
make -j$(nproc)
sudo make install
cd ~/workspace/

# yosys
cd yosys
git fetch
git pull
make clean
make -j$(nproc)
sudo make install
cd ~/workspace/

# tinyFPGA
cd TinyFPGA-BX/examples/picosoc
make clean
make upload

Although at one point the fatal error: failed to route message went away after rebuilding the toolchain, later the error returned with a vengeance. Rebuilding the toolchain didn't actually resolve the routing problem.  The ultimate solution for me here was the relatively new -r option for arachne-pnr. I opened and closed GitHub Issue #133 to help others save the time I wasted trying to resolve this. Specifically, this command:
/usr/local/bin/arachne-pnr -r -d 8k -P cm81 -o hardware.asc -p hardware.pcf hardware.blif
(I included the explicit path here to avoid ambiguity, as I found another apio binary with the same name)

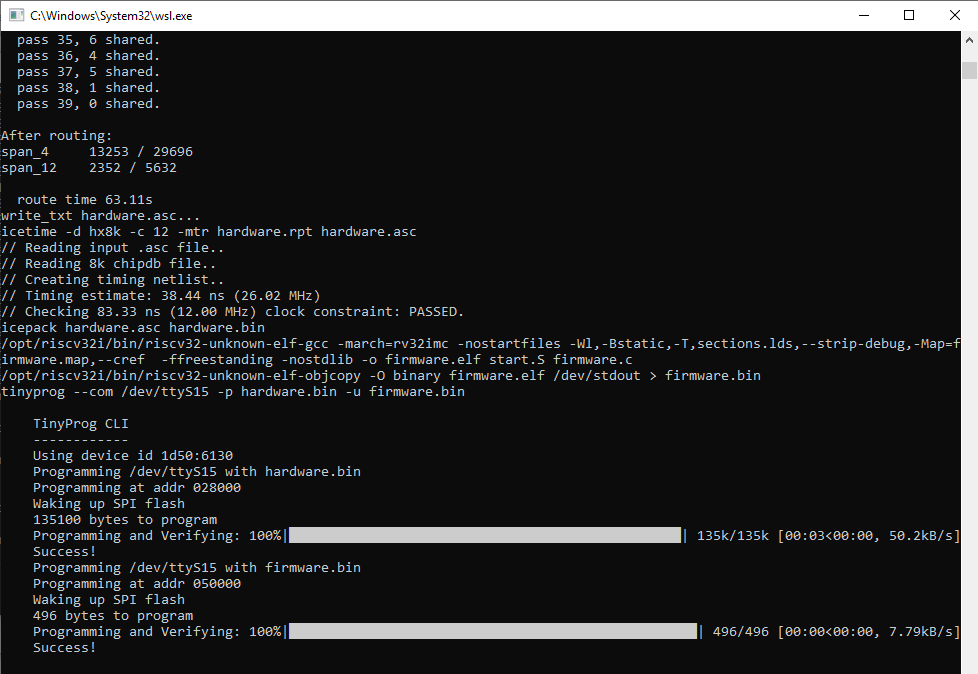
So when arachne-onr is running properly, the output should look like this:

$ /usr/local/bin/arachne-pnr -r -d 8k -P cm81 -o hardware.asc -p hardware.pcf hardware.blif
seed: 2912864674
device: 8k
read_chipdb +/share/arachne-pnr/chipdb-8k.bin...
  supported packages: bg121, bg121:4k, cb132, cb132:4k, cm121, cm121:4k, cm225, cm225:4k, cm81, cm81:4k, ct256, tq144:4k
read_blif hardware.blif...
prune...
read_pcf hardware.pcf...
hardware.pcf:43: warning: no port `pin_3' in top-level module `hardware', constraint ignored.
hardware.pcf:44: warning: no port `pin_4' in top-level module `hardware', constraint ignored.
hardware.pcf:45: warning: no port `pin_5' in top-level module `hardware', constraint ignored.
hardware.pcf:46: warning: no port `pin_6' in top-level module `hardware', constraint ignored.
hardware.pcf:47: warning: no port `pin_7' in top-level module `hardware', constraint ignored.
hardware.pcf:48: warning: no port `pin_8' in top-level module `hardware', constraint ignored.
hardware.pcf:49: warning: no port `pin_9' in top-level module `hardware', constraint ignored.
hardware.pcf:50: warning: no port `pin_10' in top-level module `hardware', constraint ignored.
hardware.pcf:51: warning: no port `pin_11' in top-level module `hardware', constraint ignored.
hardware.pcf:52: warning: no port `pin_12' in top-level module `hardware', constraint ignored.
hardware.pcf:53: warning: no port `pin_13' in top-level module `hardware', constraint ignored.
hardware.pcf:56: warning: no port `pin_14' in top-level module `hardware', constraint ignored.
hardware.pcf:57: warning: no port `pin_15' in top-level module `hardware', constraint ignored.
hardware.pcf:58: warning: no port `pin_16' in top-level module `hardware', constraint ignored.
hardware.pcf:59: warning: no port `pin_17' in top-level module `hardware', constraint ignored.
hardware.pcf:60: warning: no port `pin_18' in top-level module `hardware', constraint ignored.
hardware.pcf:61: warning: no port `pin_19' in top-level module `hardware', constraint ignored.
hardware.pcf:62: warning: no port `pin_20' in top-level module `hardware', constraint ignored.
hardware.pcf:63: warning: no port `pin_21' in top-level module `hardware', constraint ignored.
hardware.pcf:64: warning: no port `pin_22' in top-level module `hardware', constraint ignored.
hardware.pcf:65: warning: no port `pin_23' in top-level module `hardware', constraint ignored.
hardware.pcf:66: warning: no port `pin_24' in top-level module `hardware', constraint ignored.
hardware.pcf:77: warning: no port `pin_25' in top-level module `hardware', constraint ignored.
hardware.pcf:78: warning: no port `pin_26' in top-level module `hardware', constraint ignored.
hardware.pcf:79: warning: no port `pin_27' in top-level module `hardware', constraint ignored.
hardware.pcf:80: warning: no port `pin_28' in top-level module `hardware', constraint ignored.
hardware.pcf:81: warning: no port `pin_29' in top-level module `hardware', constraint ignored.
hardware.pcf:82: warning: no port `pin_30' in top-level module `hardware', constraint ignored.
hardware.pcf:83: warning: no port `pin_31' in top-level module `hardware', constraint ignored.
instantiate_io...
pack...

After packing:
IOs          13 / 63
GBs          0 / 8
  GB_IOs     0 / 8
LCs          5769 / 7680
  DFF        1491
  CARRY      821
  CARRY, DFF 157
  DFF PASS   522
  CARRY PASS 63
BRAMs        20 / 32
WARMBOOTs    0 / 1
PLLs         0 / 1

place_constraints...
promote_globals...
  promoted clk_16mhz$2, 1688 / 1688
  promoted $abc$60698$n19, 555 / 555
  promoted resetn, 326 / 326
  promoted $abc$60698$n4557, 96 / 96
  promoted soc.cpu.pcpi_div.start, 163 / 163
  promoted soc.cpu.pcpi_mul.mul_waiting, 216 / 216
  promoted $abc$60698$n4366, 73 / 74
  promoted $abc$60698$n4562, 64 / 64
  promoted 8 nets
    3 sr/we
    4 cen/wclke
    1 clk
  8 globals
    3 sr/we
    4 cen/wclke
    1 clk
realize_constants...
  realized 1
place...
  initial wire length = 116235
  at iteration #50: temp = 12.916, wire length = 103483
  at iteration #100: temp = 7.34662, wire length = 78330
  at iteration #150: temp = 3.96982, wire length = 52046
  at iteration #200: temp = 1.83918, wire length = 36981
  at iteration #250: temp = 0.150479, wire length = 27126
  at iteration #300: temp = 4.19474e-06, wire length = 26372
  final wire length = 26347

After placement:
PIOs       18 / 63
PLBs       883 / 960
BRAMs      20 / 32

  place time 41.55s
route...
  pass 1, 301 shared.
  pass 2, 150 shared.
  pass 3, 94 shared.
  pass 4, 66 shared.
  pass 5, 33 shared.
  pass 6, 26 shared.
  pass 7, 16 shared.
  pass 8, 14 shared.
  pass 9, 4 shared.
  pass 10, 5 shared.
  pass 11, 3 shared.
  pass 12, 1 shared.
  pass 13, 0 shared.

After routing:
span_4     12877 / 29696
span_12    2247 / 5632

  route time 29.61s
write_txt hardware.asc...
In particular, note how there's only one instance of 1 shared and then it decrements to 0 shared where somehow the error condition seems to get stuck on 1. I have no idea why the "Randomized Seed" fixed this. In the end, my Makefile (in my ~/workspace/TinyFPGA-BX/examples/picosoc looks like this:

upload: hardware.bin firmware.bin
        tinyprog --com /dev/ttyS8 -p hardware.bin -u firmware.bin


hardware.blif: hardware.v spimemio.v simpleuart.v picosoc.v picorv32.v
        yosys -ql hardware.log -p 'synth_ice40 -top hardware -blif hardware.blif' $^

hardware.asc: hardware.pcf hardware.blif
        arachne-pnr -r -d 8k -P cm81 -o hardware.asc -p hardware.pcf hardware.blif

hardware.bin: hardware.asc
        icetime -d hx8k -c 12 -mtr hardware.rpt hardware.asc
        icepack hardware.asc hardware.bin


firmware.elf: sections.lds start.S firmware.c
        /opt/riscv32ic/bin/riscv32-unknown-elf-gcc -march=rv32imc -nostartfiles -Wl,-Bstatic,-T,sections.lds,--strip-de$
firmware.bin: firmware.elf
        /opt/riscv32ic/bin/riscv32-unknown-elf-objcopy -O binary firmware.elf /dev/stdout > firmware.bin


clean:
        rm -f firmware.elf firmware.hex firmware.bin firmware.o firmware.map \
              hardware.blif hardware.log hardware.asc hardware.rpt hardware.bin


As RISC-V is new to me, so is the suffix information. For reference, the values are found in the The RISC-V Instruction Set Manual, specifically Table 22.1 summarizing the standardized subset names:
RISC-V : Standard ISA Subset Naming Convention 
Indeed once the icestorm and RISC-V toolchains are installed, Luke's (deceptively simple) command does it all:
cd  ~/workspace/TinyFPGA-BX/examples/picosoc
make upload
Success should look something like this:
tinyprog --com /dev/ttyS8 -p hardware.bin -u firmware.bin

    TinyProg CLI
    ------------
    Using device id 1d50:6130
    Programming /dev/ttyS8 with hardware.bin
    Programming at addr 028000
    Waking up SPI flash
    135100 bytes to program
    Programming and Verifying: 100%|█████████████████████████████████████████████████| 135k/135k [00:03<00:00 050000="" 100="" 41.0kb="" 496="" 7.46kb="" addr="" and="" at="" bytes="" code="" dev="" firmware.bin="" flash="" program="" programming="" s="" spi="" success="" to="" ttys8="" up="" verifying:="" waking="" with="">

Once code is uploaded and the device returns to bootloader mode (reset or unplugged) - the device can be rebooted to run the RISC-V code like this:
tinyprog -b -c /dev/ttyS8

The reality - is that a crazy amount of rather complex things are accomplished: Creating a soft CPU?!? On an FGPA!? Using Free and Open Source tools?! Then compiling C code for the newly implemented CPU! From the comfort of my home?! Just incredible. My thanks to everyone that has put in so much effort to make this possible: Particularly Luke Valenty (aka @tinyFPGA) and Clifford Wolf (aka @oe1cxw), along with many others. We are living in amazing times.

See my next blog on using nextpnr.

Resources, Inspiration, Credits, and Other Links:


Please leave comments, ideas, suggestions below (moderated, sometimes delayed) or send me a message at gmail, or find gojimmypi on twitter.

Find gojimmypi at gojimmypi.github.io

I'm currently working on my new blog home at  gojimmypi.github.io After implementing a variety of features such as dark mode , syntax hi...