In my
previous blog, I wrote about the problems I encountered with programming the
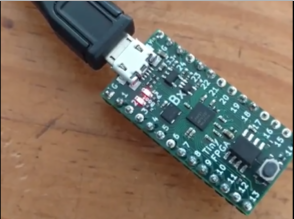
tinyFPGA BX in the
Windows Subsystem for Linux (WSL). Now that I have that resolved, onto something much more interesting: installing the
RISC-V (specifically the
PicoRV32) soft CPU onto the tinyFPGA board!
TL;DR - be sure to install all dependencies for WSL. Edit Makefile to call explicit RISC-V compiler (or edit path) and explicitly name the serial port tinyFPGA is plugged into. Use the
-r option for arachne-pnr. Be sure to have plenty of disk space (and patience, or a really fast computer)
Now, this is something well outside of my skill set and comfort zone: A soft CPU on an
FPGA! Fortunately, Luke posted this awesome
RISC-V example project on TinyFPGA BX on the
tinyFPGA discourse forum that seemed to be fairly straightforward. The target environment was a "real" Linux machine, I chose WSL, instead.
Note that as of the date of this blog, there are
several useful, but not-yet-merged PR's for the tinyFPGA BX repo that are probably useful to review.
I keep all my projects in a /workspace directory, so my tinyFPGA BX clone looks like this:
gojimmypi@MYHOST : ~
0 $ cd ~/workspace
gojimmypi@MYHOST : ~/workspace
0 $ git clone --recursive https://github.com/tinyfpga/TinyFPGA-BX.git
Cloning into 'TinyFPGA-BX'...
remote: Enumerating objects: 108, done.
remote: Total 108 (delta 0), reused 0 (delta 0), pack-reused 108
Receiving objects: 100% (108/108), 648.10 KiB | 250.00 KiB/s, done.
Resolving deltas: 100% (19/19), done.
Checking connectivity... done.
gojimmypi@MYHOST : ~/workspace
See the
icestorm install from
TinyFPGA-BX icestorm template;
I clone all of my GitHub stuff into my
~/workspace directory:
cd ~/workspace/
# install icestorm dependencies
sudo apt-get install build-essential clang bison flex libreadline-dev \
                     gawk tcl-dev libffi-dev git mercurial graphviz   \
                     xdot pkg-config python python3 libftdi-dev

# tinyFPGA BX
git clone --recursive https://github.com/tinyfpga/TinyFPGA-BX.git
cd ~/workspace/

# icestorm
git clone https://github.com/cliffordwolf/icestorm.git icestorm
cd icestorm
make -j$(nproc)
sudo make install
cd ~/workspace/

# arachne-pnr
git clone https://github.com/cseed/arachne-pnr.git arachne-pnr
cd arachne-pnr
make -j$(nproc)
sudo make install
cd ~/workspace/

# yosys
git clone https://github.com/cliffordwolf/yosys.git yosys
cd yosys
make -j$(nproc)
sudo make install
cd ~/workspace/

# picorv32
git clone https://github.com/cliffordwolf/picorv32.git

# see online instructions https://github.com/cliffordwolf/picorv32/blob/master/README.md#building-a-pure-rv32i-toolchain
#
Note that I encountered a permission error for the
make download-tools :
Checking connectivity... done.
+ mv /var/cache/distfiles/riscv-gcc.git.part /var/cache/distfiles/riscv-gcc.git
mv: cannot move ‘/var/cache/distfiles/riscv-gcc.git.part’ to ‘/var/cache/distfiles/riscv-gcc.git’: Permission denied
make: *** [download-tools] Error 1
So consider using:
sudo make download-tools Note that after I encountered the permission error, even the sudo version returned an error (I think the data was not re-created, rather used existing downloads)... so in order to fix it, I needed to manually adjust permissions:
sudo chmod 666 /var/cache/distfiles/riscv-gcc.git.part
sudo mv /var/cache/distfiles/riscv-gcc.git.part /var/cache/distfiles/riscv-gcc.git
I ended up encountering yet another odd error as well, this GitHub Connection refused:
Submodule 'riscv-qemu' (git://github.com/riscv/riscv-qemu.git) registered for path 'riscv-qemu'
Cloning into 'riscv-qemu'...
fatal: unable to connect to github.com:
github.com[0: 192.30.255.113]: errno=Connection refused
github.com[1: 192.30.255.112]: errno=Connection refused

Clone of 'git://github.com/riscv/riscv-qemu.git' into submodule path 'riscv-qemu' failed
make[1]: *** [build-riscv32i-tools-bh] Error 1
make[1]: Leaving directory `/home/gojimmypi/workspace/picorv32'
make: *** [build-tools] Error 2
I opened a
GitHub issue cliffordwolf/picorv32 #106 for this. In short, for some reason my WSL decided to have some sort of "git port is restricted" error for
git://. The fix as noted in the issue was:
git config --global url.https://github.com/.insteadOf git://github.com/
To undo this:
git config --global --unset url.https://github.com/.insteadOf
If you prefer to not do this on a global scale, simply remove the
--global.
As I was trying to to this in WSL instead of a "real" Linux environment, I stumbled a bit. First - the RISC-V
toolchain did not compile - instead ending in a simple "recipe for 'build-tools' failed". Early on in the process, this error was encountered:
checking for the correct version of gmp.h... no
configure: error: Building GCC requires GMP 4.2+, MPFR 2.4.0+ and MPC 0.8.0+.
Try the --with-gmp, --with-mpfr and/or --with-mpc options to specify
their locations.  Source code for these libraries can be found at
their respective hosting sites as well as at
ftp://gcc.gnu.org/pub/gcc/infrastructure/.  See also
http://gcc.gnu.org/install/prerequisites.html for additional info.  If
you obtained GMP, MPFR and/or MPC from a vendor distribution package,
make sure that you have installed both the libraries and the header
files.  They may be located in separate packages.
yes
checking whether stdint.h conforms to C99... Makefile:415: recipe for target 'stamps/build-gcc-newlib-stage1' failed
make[2]: *** [stamps/build-gcc-newlib-stage1] Error 1
make[2]: *** Waiting for unfinished jobs....
It is unfortunate that the build attempt continued, as it takes an incredibly long time on my machine. Eventually it returned with:
make[2]: Leaving directory '/home/gojimmypi/workspace/picorv32/riscv-gnu-toolchain-riscv32i/build'
Makefile:154: recipe for target 'build-riscv32i-tools-bh' failed
make[1]: *** [build-riscv32i-tools-bh] Error 2
make[1]: Leaving directory '/home/gojimmypi/workspace/picorv32'
Makefile:160: recipe for target 'build-tools' failed
make: *** [build-tools] Error 2
A quick google search and I found
this helpful how-to on stackoverflow. Although a bit detailed and verbose, the only information I needed was in the sentence:
For Debian based system including Ubuntu, Install libgmp-dev, libmpfr-dev and libmpc-dev packages.
For my Ubuntu-like WSL this translated to:
sudo apt-get install libgmp3-dev --assume-yes
sudo apt-get install libmpfr-dev --assume-yes
sudo apt-get install libmpc-dev  --assume-yes
(TODO: do I need libgmp3-dev or simply libgmp-dev ?)
Update: the TL;DR instructions on simply running the TL;DR
Building a pure RV32I Toolchain like this:
make download-tools
make -j$(nproc) build-tools
...does not include downloading all of the dependencies. So first use the install shown a few lines down:
sudo apt-get install autoconf automake autotools-dev curl libmpc-dev \
        libmpfr-dev libgmp-dev gawk build-essential bison flex texinfo \
    gperf libtool patchutils bc zlib1g-dev git libexpat1-dev
After that, the build was successful! However, I was still not able to actually call the compiler:
/usr/bin/install -c -m 644 b-header-vars /opt/riscv32imc/lib/gcc/riscv32-unknown-elf/8.2.0/plugin/include/b-header-vars
make[5]: Leaving directory '/home/gojimmypi/workspace/picorv32/riscv-gnu-toolchain-riscv32imc/build/build-gcc-newlib-stage2/gcc'
make[4]: Leaving directory '/home/gojimmypi/workspace/picorv32/riscv-gnu-toolchain-riscv32imc/build/build-gcc-newlib-stage2'
make[3]: Leaving directory '/home/gojimmypi/workspace/picorv32/riscv-gnu-toolchain-riscv32imc/build/build-gcc-newlib-stage2'
mkdir -p stamps/ && touch stamps/build-gcc-newlib-stage2
make[2]: Leaving directory '/home/gojimmypi/workspace/picorv32/riscv-gnu-toolchain-riscv32imc/build'
make[1]: Leaving directory '/home/gojimmypi/workspace/picorv32'
gojimmypi@MYHOST : ~/workspace/picorv32
0 $ riscv32-unknown-elf-gcc
riscv32-unknown-elf-gcc: command not found
Fortunately this was a simple matter of the command not being in the path. I started a fresh WSL instance to be sure, and indeed it was not added to my path. So I manually edited
Luke's Makefile to explicitly name the path. I searched from it in DOS, and found several of them in each of these directories (just as described in the
instructions):
 Directory of C:\Users\gojimmypi\AppData\Local\Packages\CanonicalGroupLimited.UbuntuonWindows_79rhkp1fndgsc\LocalState\rootfs\opt

01/03/2019  07:47 PM    <DIR>          riscv32i
01/03/2019  09:08 PM    <DIR>          riscv32ic
01/03/2019  10:26 PM    <DIR>          riscv32im
01/03/2019  11:47 PM    <DIR>          riscv32imc
               0 File(s)              0 bytes
In particular, look at those creation dates! The full monty compile took quite a long time on my system. Together, the 4 of them take up over 3GB of disk space in the
/opt directory! I'm not sure how accurate that is - as when going to the parent directory in Windows:
C:\Users\gojimmypi\AppData\Local\Packages\CanonicalGroupLimited.UbuntuonWindows_79rhkp1fndgsc\LocalState
The
.\LocalState\rootfs directory is less than 2 GB, despite
.\LocalState\rootfs\opt containing over 3GB. The reality is that somehow after this exercise, overall my disk has nearly 20GB less free space. :/
Here's what the rootfs directory looks like in Windows File Explorer (rick-click, properties)
However when running this command (note that I piped it to a file, which is much faster than sending 65MB to the screen):
dir C:\Users\gojimmypi\AppData\Local\Packages\CanonicalGroupLimited.UbuntuonWindows_79rhkp1fndgsc\LocalState\rootfs\ /s > myWSL_rootfs.txt
The resultant file size is considerably larger than reported in Windows Explorer:
     Total Files Listed:
           933087 File(s) 31,192,151,953 bytes
           125544 Dir(s)   5,549,752,320 bytes free
Note my local
picorv32 from github ended up here on my Windows file system:
C:\Users\gojimmypi\AppData\Local\Packages\CanonicalGroupLimited.UbuntuonWindows_79rhkp1fndgsc\LocalState\rootfs\home\gojimmypi\workspace\picorv32
It appears as
/home/gojimmypi/workspace/picorv32 in WSL:
gojimmypi@MYHOST : ~/workspace/picorv32
0 $ pwd
/home/gojimmypi/workspace/picorv32
gojimmypi@MYHOST : ~/workspace/picorv32
0 $ ls
dhrystone  picorv32.core  README.md                      riscv-gnu-toolchain-riscv32im   showtrace.py    testbench.v
firmware   picorv32.v     riscv-gnu-toolchain-riscv32i   riscv-gnu-toolchain-riscv32imc  testbench.cc    testbench_wb.v
Makefile   picosoc        riscv-gnu-toolchain-riscv32ic  scripts                         testbench_ez.v  tests
gojimmypi@MYHOST : ~/workspace/picorv32
0 $
And sure enough: a whopping 20GB!
gojimmypi@MYHOST : ~/workspace/picorv32
0 $ du -h
...
4.9G    ./riscv-gnu-toolchain-riscv32imc
20K     ./scripts/csmith
24K     ./scripts/cxxdemo
16K     ./scripts/icestorm
16K     ./scripts/presyn
32K     ./scripts/quartus
28K     ./scripts/romload
56K     ./scripts/smtbmc
12K     ./scripts/tomthumbtg
40K     ./scripts/torture
36K     ./scripts/vivado
8.0K    ./scripts/yosys
12K     ./scripts/yosys-cmp
300K    ./scripts
205K    ./tests
20G     .
One more thing for future reference: I was not starting with a clean WSL. I don't know if anything I had previously installed was also a missing requirement. Using
history | grep "sudo apt-get install", I found that I had previously manually installed these items:
sudo apt-get install gdb
sudo apt-get install libdevice-serialport-perl
sudo apt-get install libyaml-perl
sudo apt-get install binutils
sudo apt-get install build-essential clang bison flex libreadline-dev
sudo apt-get install gawk tcl-dev libffi-dev git mercurial graphviz
sudo apt-get install xdot pkg-config python python3 libftdi-dev
sudo apt-get install libtool
sudo apt-get install automake
sudo apt-get install make unrar-free autoconf automake libtool gcc g++ gperf
sudo apt-get install flex bison texinfo gawk ncurses-dev libexpat-dev python-dev python python-serial
sudo apt-get install sed git unzip bash help2man wget bzip2
sudo apt-get install lzip
sudo apt-get install extract
sudo apt-get install cu
sudo apt-get install setserial
sudo apt-get install libgmp3-dev
sudo apt-get install libmpfr-dev
sudo apt-get install libmpc-dev
If for some reason you want to install all of these as well:
sudo apt-get install gdb \
                     libdevice-serialport-perl \
                     libyaml-perl \
                     binutils \
                     build-essential clang bison flex libreadline-dev \
                     gawk tcl-dev libffi-dev git mercurial graphviz \
                     xdot pkg-config python python3 libftdi-dev \
                     libtool \
                     automake \
                     make unrar-free autoconf automake libtool gcc g++ gperf \
                     flex bison texinfo gawk ncurses-dev libexpat-dev python-dev python python-serial \
                     sed git unzip bash help2man wget bzip2 \
                     lzip \
                     extract \
                     cu \
                     setserial \
                     libgmp3-dev \
                     libmpfr-dev \
                     libmpc-dev
Back to calling the compiler: here are the lines I edited in the
Makefile to explicitly call the RISC-V compiler I wanted:
firmware.elf: sections.lds start.S firmware.c
 /opt/riscv32i/bin/riscv32-unknown-elf-gcc -march=rv32imc -nostartfiles -Wl,-Bstatic,-T,sections.lds,--strip-debug,-Map=firmware.map,--cref  -ffreestanding -nostdlib -o firmware.elf start.S firmware.c

firmware.bin: firmware.elf
 /opt/riscv32i/bin/riscv32-unknown-elf-objcopy -O binary firmware.elf /dev/stdout > firmware.bin
One of the things I wondered: once the RISC-V processor is created on the FPGA chip... how to I get it to actually run code that I create? Is there a special "soft-JTAG" created? A "soft-UART"? If so, which pins would be used? Perhaps some sort of bootloader? As it turns out... none of those; the solution is quite simple, thanks to some clever work by Luke when implementing his tinyFPGA board. When using the tinyprog command-line tool, in addition to the
-p to program the FPGA, there's a
-u option to also upload firmware! And yes - this is the firmware code that the soft RISC-V CPU will execute. Brilliant! Ok, perhaps not the most efficient to
recreate the entire CPU when the app changes, but it is certainly easy.
So the "app" that gets compiled by the new RISC-V toolchain is the firmware found
here. So ok, clearly there are several un-intuitive things going on there. But it is an excellent template to get started and to learn a tremendous amount this RISC-V implementation in Verilog on an FPGA.
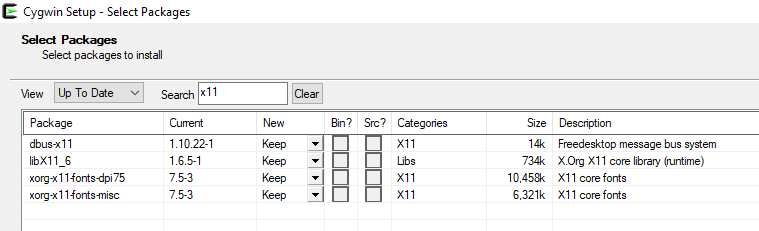
At this point, if the tinyFPGA dependencies are not installed per the
TinyFPGA BX User Guide, these commands are needed in WSL (note that indeed Python was pre-installed, but
pip was not):
sudo apt-get install python-pip
sudo pip install apio==0.4.0b5 tinyprog
apio install system scons icestorm iverilog
sudo apio drivers --serial-enable
As noted in my previous blog, there were some problems in WSL talking to my tinyFPGA board. Specifically, unlike in DOS, the tinyprog tool does not automatically find my tingFPGA board. Thus another minor change was needed to the
Makefile. My tinyFPGA board appears as COM15: in Windows... thus
/dev/ttyS15 in WSL. So for the upload part, I changed my Makefile to explicitly name that port:
upload: hardware.bin firmware.bin
        tinyprog --com /dev/ttyS15 -p hardware.bin -u firmware.bin
Also: note that once uploaded, the tinyFPGA powers on into "bootloader mode". Pressing reset apparently returns it to boot loader mode as well. That would seem rather unfortunate for any actual in-the-field projects. I wonder if there's some way to not power on like that?
In order to exit bootloader mode, I use this command:
tinyprog -b -c /dev/ttyS15
Unless you want to run as sudo, I ended up having to adjust the permissions. This command did *not* work for me:
sudo usermod -a -G dialout $USER
Apparently there's an
issue with WSL dev/tty permissions so instead I used:
sudo chmod 0666 /dev/ttyS15
When I first plugged in my tinyFPGA, Windows gave the "We're setting up 'Unknown Device'" message. Upon completion, the tinyFPGA did not appear. Unplugging and reinserting resolved this for me. Note that in order to program the tinyFPGA, we do need to be in bootloader mode (press reset on tinyFPGA), otherwise we'll see an error like this:
0 $ make upload
tinyprog --com /dev/ttyS15 -p hardware.bin -u firmware.bin

    TinyProg CLI
    ------------
    Using device id 1d50:6130
Traceback (most recent call last):
  File "/home/gojimmypi/.local/bin/tinyprog", line 11, in
    sys.exit(main())
  File "/home/gojimmypi/.local/lib/python2.7/site-packages/tinyprog/__main__.py", line 325, in main
    with active_port:
  File "/home/gojimmypi/.local/lib/python2.7/site-packages/tinyprog/__init__.py", line 66, in __enter__
    self.ser = serial.Serial(self.port_name, timeout=1.0, writeTimeout=1.0).__enter__()
  File "/home/gojimmypi/.local/lib/python2.7/site-packages/serial/serialutil.py", line 240, in __init__
    self.open()
  File "/home/gojimmypi/.local/lib/python2.7/site-packages/serial/serialposix.py", line 268, in open
    raise SerialException(msg.errno, "could not open port {}: {}".format(self._port, msg))
serial.serialutil.SerialException: [Errno 5] could not open port /dev/ttyS15: [Errno 5] Input/output error: '/dev/ttyS15'
Makefile:3: recipe for target 'upload' failed
make: *** [upload] Error 1
Also note that I was unable to use the riscv32ic, riscv32ic, or riscv32icm toolchains resulting in errors like this:
...
  pass 198, 1 shared.
  pass 199, 1 shared.
  pass 200, 1 shared.
fatal error: failed to route
Makefile:10: recipe for target 'hardware.asc' failed
make: *** [hardware.asc] Error 1
So unless you know you need those other toolchains for other RISC-V stuff, perhaps best to not waste time (and disk space!) compiling them all.
Note that afterwards, I found that even riscv32i was not working! Upon reinstalling the icestorm toolchain, this was resolved - and I was able to use all 4 of the riscv32i[c][m] flavors.
Here is what I did to rebuild the
icestorm /
arachne-pnr /
yosys toolchain:
# capture copy/paste with an initial sudo command
cd ~/workspace/
sudo ls

# ensure dependencies are fresh
sudo apt-get update
sudo apt-get upgrade

cd ~/workspace/
# tinyFPGA BX
cd TinyFPGA-BX
git fetch
git pull
cd ~/workspace/

# icestorm
cd icestorm
git fetch
git pull
make clean
make -j$(nproc)
sudo make install
cd ~/workspace/

# arachne-pnr
cd arachne-pnr
git fetch
git pull
make clean
make -j$(nproc)
sudo make install
cd ~/workspace/

# yosys
cd yosys
git fetch
git pull
make clean
make -j$(nproc)
sudo make install
cd ~/workspace/

# tinyFPGA
cd TinyFPGA-BX/examples/picosoc
make clean
make upload
Although at one point the
fatal error: failed to route message went away after rebuilding the toolchain, later the error returned with a vengeance. Rebuilding the toolchain didn't actually resolve the routing problem. The ultimate solution for me here was the relatively new
-r option for arachne-pnr. I opened and closed
GitHub Issue #133 to help others save the time I wasted trying to resolve this. Specifically, this command:
/usr/local/bin/arachne-pnr -r -d 8k -P cm81 -o hardware.asc -p hardware.pcf hardware.blif
(I included the explicit path here to avoid ambiguity, as I found another apio binary with the same name)
So when arachne-onr is running properly, the output should look like this:
$ /usr/local/bin/arachne-pnr -r -d 8k -P cm81 -o hardware.asc -p hardware.pcf hardware.blif
seed: 2912864674
device: 8k
read_chipdb +/share/arachne-pnr/chipdb-8k.bin...
  supported packages: bg121, bg121:4k, cb132, cb132:4k, cm121, cm121:4k, cm225, cm225:4k, cm81, cm81:4k, ct256, tq144:4k
read_blif hardware.blif...
prune...
read_pcf hardware.pcf...
hardware.pcf:43: warning: no port `pin_3' in top-level module `hardware', constraint ignored.
hardware.pcf:44: warning: no port `pin_4' in top-level module `hardware', constraint ignored.
hardware.pcf:45: warning: no port `pin_5' in top-level module `hardware', constraint ignored.
hardware.pcf:46: warning: no port `pin_6' in top-level module `hardware', constraint ignored.
hardware.pcf:47: warning: no port `pin_7' in top-level module `hardware', constraint ignored.
hardware.pcf:48: warning: no port `pin_8' in top-level module `hardware', constraint ignored.
hardware.pcf:49: warning: no port `pin_9' in top-level module `hardware', constraint ignored.
hardware.pcf:50: warning: no port `pin_10' in top-level module `hardware', constraint ignored.
hardware.pcf:51: warning: no port `pin_11' in top-level module `hardware', constraint ignored.
hardware.pcf:52: warning: no port `pin_12' in top-level module `hardware', constraint ignored.
hardware.pcf:53: warning: no port `pin_13' in top-level module `hardware', constraint ignored.
hardware.pcf:56: warning: no port `pin_14' in top-level module `hardware', constraint ignored.
hardware.pcf:57: warning: no port `pin_15' in top-level module `hardware', constraint ignored.
hardware.pcf:58: warning: no port `pin_16' in top-level module `hardware', constraint ignored.
hardware.pcf:59: warning: no port `pin_17' in top-level module `hardware', constraint ignored.
hardware.pcf:60: warning: no port `pin_18' in top-level module `hardware', constraint ignored.
hardware.pcf:61: warning: no port `pin_19' in top-level module `hardware', constraint ignored.
hardware.pcf:62: warning: no port `pin_20' in top-level module `hardware', constraint ignored.
hardware.pcf:63: warning: no port `pin_21' in top-level module `hardware', constraint ignored.
hardware.pcf:64: warning: no port `pin_22' in top-level module `hardware', constraint ignored.
hardware.pcf:65: warning: no port `pin_23' in top-level module `hardware', constraint ignored.
hardware.pcf:66: warning: no port `pin_24' in top-level module `hardware', constraint ignored.
hardware.pcf:77: warning: no port `pin_25' in top-level module `hardware', constraint ignored.
hardware.pcf:78: warning: no port `pin_26' in top-level module `hardware', constraint ignored.
hardware.pcf:79: warning: no port `pin_27' in top-level module `hardware', constraint ignored.
hardware.pcf:80: warning: no port `pin_28' in top-level module `hardware', constraint ignored.
hardware.pcf:81: warning: no port `pin_29' in top-level module `hardware', constraint ignored.
hardware.pcf:82: warning: no port `pin_30' in top-level module `hardware', constraint ignored.
hardware.pcf:83: warning: no port `pin_31' in top-level module `hardware', constraint ignored.
instantiate_io...
pack...

After packing:
IOs          13 / 63
GBs          0 / 8
  GB_IOs     0 / 8
LCs          5769 / 7680
  DFF        1491
  CARRY      821
  CARRY, DFF 157
  DFF PASS   522
  CARRY PASS 63
BRAMs        20 / 32
WARMBOOTs    0 / 1
PLLs         0 / 1

place_constraints...
promote_globals...
  promoted clk_16mhz$2, 1688 / 1688
  promoted $abc$60698$n19, 555 / 555
  promoted resetn, 326 / 326
  promoted $abc$60698$n4557, 96 / 96
  promoted soc.cpu.pcpi_div.start, 163 / 163
  promoted soc.cpu.pcpi_mul.mul_waiting, 216 / 216
  promoted $abc$60698$n4366, 73 / 74
  promoted $abc$60698$n4562, 64 / 64
  promoted 8 nets
    3 sr/we
    4 cen/wclke
    1 clk
  8 globals
    3 sr/we
    4 cen/wclke
    1 clk
realize_constants...
  realized 1
place...
  initial wire length = 116235
  at iteration #50: temp = 12.916, wire length = 103483
  at iteration #100: temp = 7.34662, wire length = 78330
  at iteration #150: temp = 3.96982, wire length = 52046
  at iteration #200: temp = 1.83918, wire length = 36981
  at iteration #250: temp = 0.150479, wire length = 27126
  at iteration #300: temp = 4.19474e-06, wire length = 26372
  final wire length = 26347

After placement:
PIOs       18 / 63
PLBs       883 / 960
BRAMs      20 / 32

  place time 41.55s
route...
  pass 1, 301 shared.
  pass 2, 150 shared.
  pass 3, 94 shared.
  pass 4, 66 shared.
  pass 5, 33 shared.
  pass 6, 26 shared.
  pass 7, 16 shared.
  pass 8, 14 shared.
  pass 9, 4 shared.
  pass 10, 5 shared.
  pass 11, 3 shared.
  pass 12, 1 shared.
  pass 13, 0 shared.

After routing:
span_4     12877 / 29696
span_12    2247 / 5632

  route time 29.61s
write_txt hardware.asc...
In particular, note how there's only one instance of
1 shared and then it decrements to
0 shared where somehow the error condition seems to get stuck on 1. I have no idea why the "Randomized Seed" fixed this. In the end, my Makefile (in my
~/workspace/TinyFPGA-BX/examples/picosoc looks like this:
upload: hardware.bin firmware.bin
        tinyprog --com /dev/ttyS8 -p hardware.bin -u firmware.bin


hardware.blif: hardware.v spimemio.v simpleuart.v picosoc.v picorv32.v
        yosys -ql hardware.log -p 'synth_ice40 -top hardware -blif hardware.blif' $^

hardware.asc: hardware.pcf hardware.blif
        arachne-pnr -r -d 8k -P cm81 -o hardware.asc -p hardware.pcf hardware.blif

hardware.bin: hardware.asc
        icetime -d hx8k -c 12 -mtr hardware.rpt hardware.asc
        icepack hardware.asc hardware.bin


firmware.elf: sections.lds start.S firmware.c
        /opt/riscv32ic/bin/riscv32-unknown-elf-gcc -march=rv32imc -nostartfiles -Wl,-Bstatic,-T,sections.lds,--strip-de$
firmware.bin: firmware.elf
        /opt/riscv32ic/bin/riscv32-unknown-elf-objcopy -O binary firmware.elf /dev/stdout > firmware.bin


clean:
        rm -f firmware.elf firmware.hex firmware.bin firmware.o firmware.map \
              hardware.blif hardware.log hardware.asc hardware.rpt hardware.bin
As RISC-V is new to me, so is the suffix information. For reference, the values are found in the
The RISC-V Instruction Set Manual, specifically Table 22.1 summarizing the standardized subset names:
 |
| RISC-V : Standard ISA Subset Naming Convention |
Indeed once the icestorm and RISC-V toolchains are installed, Luke's (deceptively simple) command does it all:
cd  ~/workspace/TinyFPGA-BX/examples/picosoc
make upload
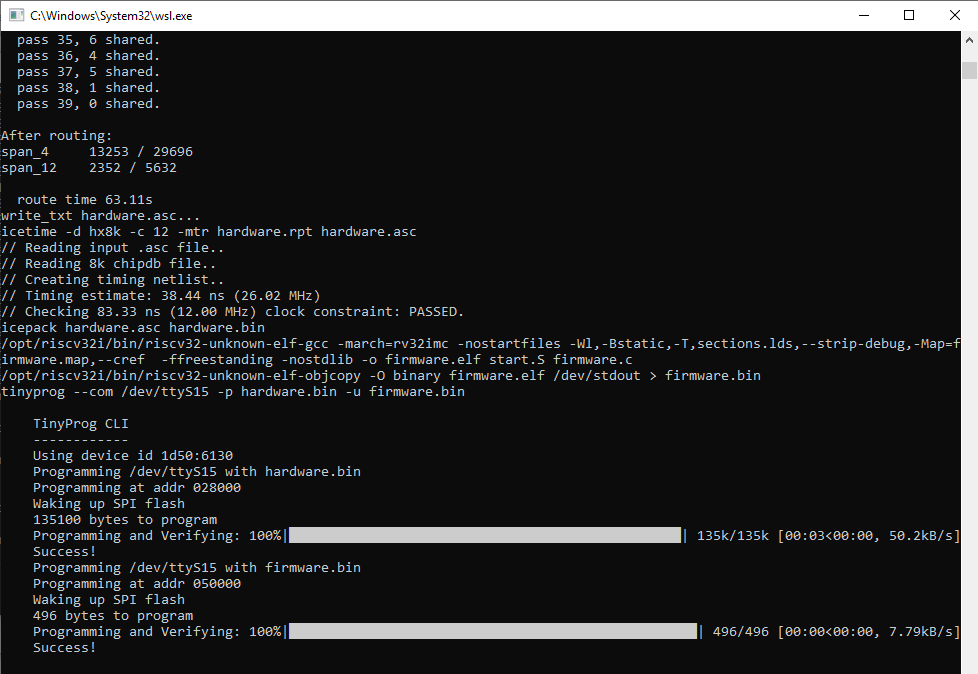
Success should look something like this:
tinyprog --com /dev/ttyS8 -p hardware.bin -u firmware.bin

    TinyProg CLI
    ------------
    Using device id 1d50:6130
    Programming /dev/ttyS8 with hardware.bin
    Programming at addr 028000
    Waking up SPI flash
    135100 bytes to program
    Programming and Verifying: 100%|█████████████████████████████████████████████████| 135k/135k [00:03<00:00 050000="" 100="" 41.0kb="" 496="" 7.46kb="" addr="" and="" at="" bytes="" code="" dev="" firmware.bin="" flash="" program="" programming="" s="" spi="" success="" to="" ttys8="" up="" verifying:="" waking="" with="">
Once code is uploaded and the device returns to bootloader mode (reset or unplugged) - the device can be rebooted to run the RISC-V code like this:
tinyprog -b -c /dev/ttyS8
The reality - is that a crazy amount of rather complex things are accomplished: Creating a soft CPU?!? On an FGPA!? Using Free and Open Source tools?! Then compiling C code for the newly implemented CPU! From the comfort of my home?! Just incredible. My thanks to everyone that has put in so much effort to make this possible: Particularly
Luke Valenty (aka @tinyFPGA) and
Clifford Wolf (aka @oe1cxw), along with many others. We are living in amazing times.
See my next blog on using
nextpnr.
Resources, Inspiration, Credits, and Other Links:
Please leave comments, ideas, suggestions below (moderated, sometimes delayed) or send me a message at gmail, or find
gojimmypi on twitter.